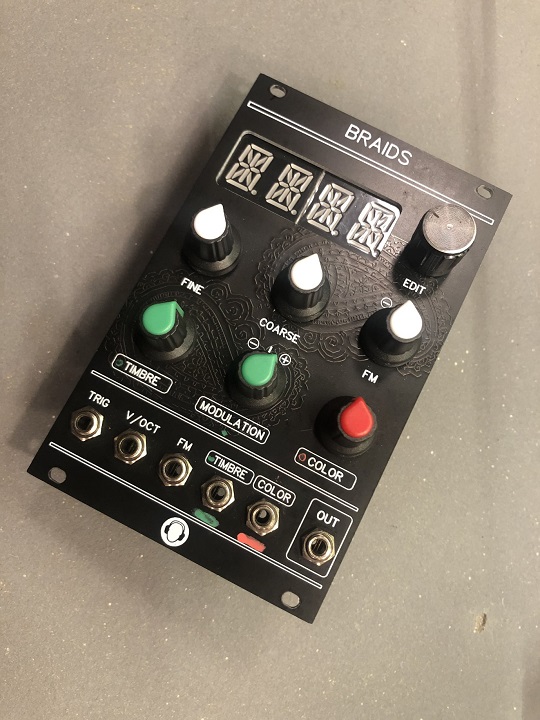
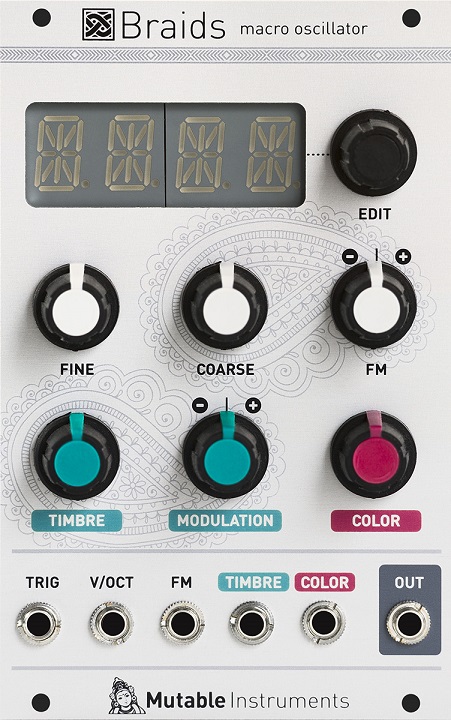
Difference between revisions of "Through-hole Braids"
Jump to navigation
Jump to search
Blwikiadmin (talk | contribs) |
Blwikiadmin (talk | contribs) |
||
| Line 15: | Line 15: | ||
* [https://docs.google.com/spreadsheets/d/1Df8stfFI7w85-BXjg3eo-WGQV3X9572D4Pd4wxk09Cs/edit?usp=sharing BOM] | * [https://docs.google.com/spreadsheets/d/1Df8stfFI7w85-BXjg3eo-WGQV3X9572D4Pd4wxk09Cs/edit?usp=sharing BOM] | ||
* [https://docs.google.com/document/d/1Abn1zaVfb9EWQT7AOmkBqb_WW_tSImPcawUhbSnykno/edit?usp=sharing Assembly Notes] | * [https://docs.google.com/document/d/1Abn1zaVfb9EWQT7AOmkBqb_WW_tSImPcawUhbSnykno/edit?usp=sharing Assembly Notes] | ||
| + | <pre> | ||
| + | I am not into making assembly instructions or tutorials, but if you’d like to do a step by step assembly guide, I’d be happy to publish it. The PCBs were drawn with both parts numbers and part values on, so you can work faster without checking the BOM every 5 seconds. I also added PDFs of the PCB silkscreens on the project page, as the printed silkscreens can be sometimes low resolution and difficult to read. | ||
| + | Recommendations: | ||
| + | |||
| + | - Always start with the lowest profile part (resistors) and then move on to next “in height” | ||
| + | - Check twice, solder once!! | ||
| + | - It’s better to solder all the resistors located around the display at the BACK of the PCB, as they are quite close to the edge of the display. | ||
| + | - It’s better to solder the display when the front panel has been mounted so you can make it as flush as possible with the back of the from panel. | ||
| + | - The STM32F103/blue pill needs to be soldered at the back!! | ||
| + | - Use female headers for the STM32F103! | ||
| + | - You can use sockets for all the ICs, especially if you are starting with Synth DIY | ||
| + | - You can screw the voltage regulators to the PCB for better heat sinking using M3 screw and nut | ||
| + | - The voltage reference have different grades (A, B, C, D), A means the best. MI uses C grade for all CV inputs (VOCT as well). But you can use B or A, use D will probably not ruin your module. | ||
| + | - The voltage regulators could be either LM or LD1117 | ||
| + | - If you got a V1.0 PCB, you won’t need R22 and Q7 around the analog 3.3V voltage regulator | ||
| + | </pre> | ||
<video type="youtube">EpqNQiMcVl8</video> | <video type="youtube">EpqNQiMcVl8</video> | ||
Revision as of 18:22, 14 November 2022
Contents
Features
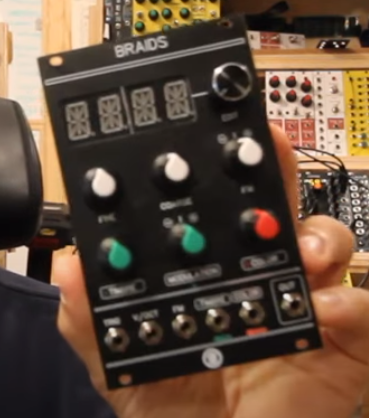
- Through hole version of Mutable Instruments Braids
- Braids is a voltage-controlled monophonic digital sound source
Credits / Resources
- Ordered card set from Sourcery Studios on Tindie
- Vagrant environment for Mutable Instruments modules hacking
- Schematic
- BOM
- Assembly Notes
I am not into making assembly instructions or tutorials, but if you’d like to do a step by step assembly guide, I’d be happy to publish it. The PCBs were drawn with both parts numbers and part values on, so you can work faster without checking the BOM every 5 seconds. I also added PDFs of the PCB silkscreens on the project page, as the printed silkscreens can be sometimes low resolution and difficult to read.

Recommendations:

- Always start with the lowest profile part (resistors) and then move on to next “in height”
- Check twice, solder once!!
- It’s better to solder all the resistors located around the display at the BACK of the PCB, as they are quite close to the edge of the display.
- It’s better to solder the display when the front panel has been mounted so you can make it as flush as possible with the back of the from panel.
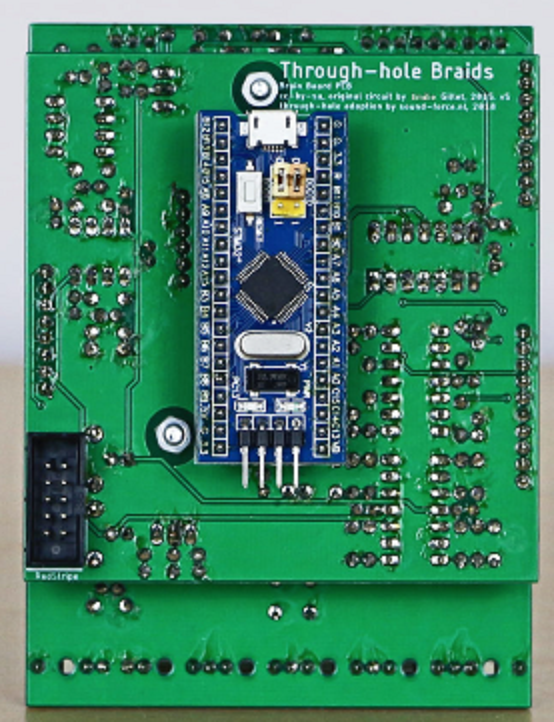
- The STM32F103/blue pill needs to be soldered at the back!!
- Use female headers for the STM32F103!
- You can use sockets for all the ICs, especially if you are starting with Synth DIY
- You can screw the voltage regulators to the PCB for better heat sinking using M3 screw and nut
- The voltage reference have different grades (A, B, C, D), A means the best. MI uses C grade for all CV inputs (VOCT as well). But you can use B or A, use D will probably not ruin your module.
- The voltage regulators could be either LM or LD1117
- If you got a V1.0 PCB, you won’t need R22 and Q7 around the analog 3.3V voltage regulator
Original Braids
- 16 HP
- 25mm deep
- +12V@100mA, -12V@15mA
- Braids Through Hole version has differences
- Output is PWM
- A/D is 10-bits
Original Braids Features
AN ATLAS OF WAVEFORM GENERATION TECHNIQUES
- Braids is a voltage-controlled monophonic digital sound source.
- Sound source… like an oscillator? Not really.
- Most of the timbres it generates are so complex that approaching them with a classic analog modular setup would require a full case of oscillators, filters, VCAs, waveshapers and ring-modulators – that’s why we call it a macro-oscillator – intricate digital synthesis algorithms wrapped in oscillator’s clothes.
- 2 KNOBS TO RULE THEM ALL
- Each algorithm is controlled by two continuously variable parameters, TIMBRE and COLOR, both of them voltage controllable.
- Instead of being directly assigned to the intricate details of the synthesis algorithm, they work as meta-parameters going through all the sweet spots.
- Very often, these parameters simultaneously affect several dimensions of timbre, creating very complex movements which would be hard to generate with a traditional setup.
- Synthesis models
- The classics
- CS-80 style sawtooth with a notch.
- Continuously variable morphing between triangle, sawtooth, square and pulse, with character control.
- Square/sawtooth with pulse width control.
- Triangle to sine morphing, with wavefolder.
- Direct digital synthesis
- Band-limited dual pulse train, with detuning.
- Dual square or sawtooth oscillator with hard sync.
- Triple saw, square, triangle or sine.
- Stack of three ring-modulated sine waves.
- Swarm of seven sawtooth waves.
- Comb-filtered sawtooth wave
- Circuit-bent sawtooth generator with sample rate reduction and bit toggling.
- Direct synthesis of filtered waveforms, casio CZ style.
- Low-fi or hi-fi vowel/formant synthesis.
- Harmonic oscillator.
- FM with various feedback paths.
- Physical and percussive models
- Plucked string (Karplus Strong).
- Bowed string.
- Reed and flute.
- Bell and metallic drum.
- 808 bass drum, cymbal noise and snare drum.
- Wavetables
- 256 waveforms, organized as 21 wavetables or as a 16x16 XY map.
- 4-note chord synthesis.
- Noise sources
- Noise processed by a tuned multimode filter.
- Noise processed by a dual BP filter.
- Clocked digital noise.
- Cloud of sinusoidal grains.
- Particle synthesis.
- Additional settings
- These settings are accessible through a menu, and are not CV controllable.
- Bit-depth (from 4 to 16 bits) and sample rate (from 4kHz to 96kHz).
- Quantizer on the CV-input with a large selection of scales.
- Analog VCO-style linear detuning of higher frequencies.
- Analog VCO-style pitch drifting.
- Waveform quirks, unique to each module built.
- Built-in AD envelope, assignable to the oscillator frequency, the COLOR and TIMBRE parameters, and to the amplitude.
- META mode enabling CV-controlled model selection with the FM input.
- Specifications
- All inputs: 100k impedance, DC to 4kHz.
- 12-bit CV capture.
- 96kHz, 16-bit audio processing (some algorithms are 2x or 4x oversampled).
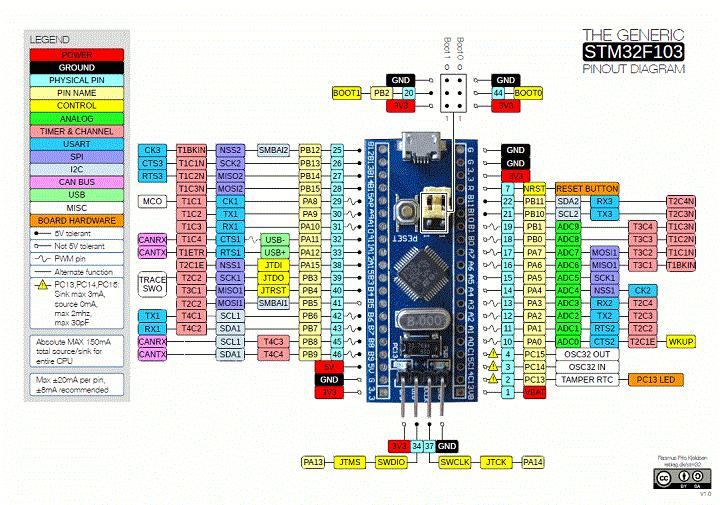
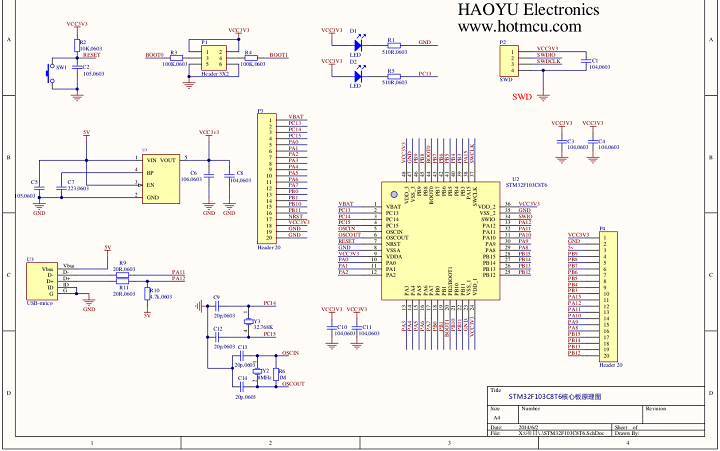
STM32 "Blue Pill"
- "Blue Pill" Pins
- "Blue Pill" Schematic
Show Screen Caps
Braids Show Notes
- Get the PCB set with panel and both PCBs for 9$ at Kristian's Tindie store
- Tindie store
- (Or) Download the Gerber files
- 5pcs Red Common Cathode 7 segment display - MAKE SURE TO CHOOSE COMMON CATHODE
- Get a STM32 Programmer here
- STM32F013CBT8 (128kb version) on ebay... not that many to choose from :/
- The STM32F103C8T6 is the 64kb version and thus too small but SOMETIMES they are 128kb
- Front panel gerber by MyModularJourney
- Braids illustrated. all the waveforms explained
- Emilie Gilet / Mutable Instruments modules Github
- Modular in a Week playlist
- Support Kristian's work on Patreon
- Kristian's Discord server - where you find the mi-th-braids channel and much more]
- See mi-th-braids channel
- See pinned messages
- Braids Manual
Build
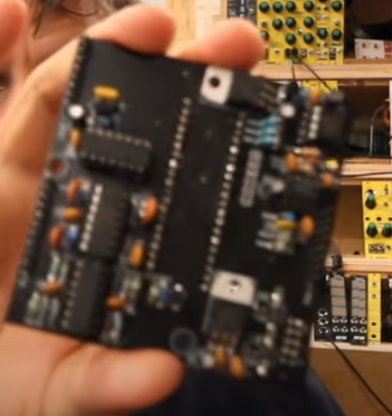
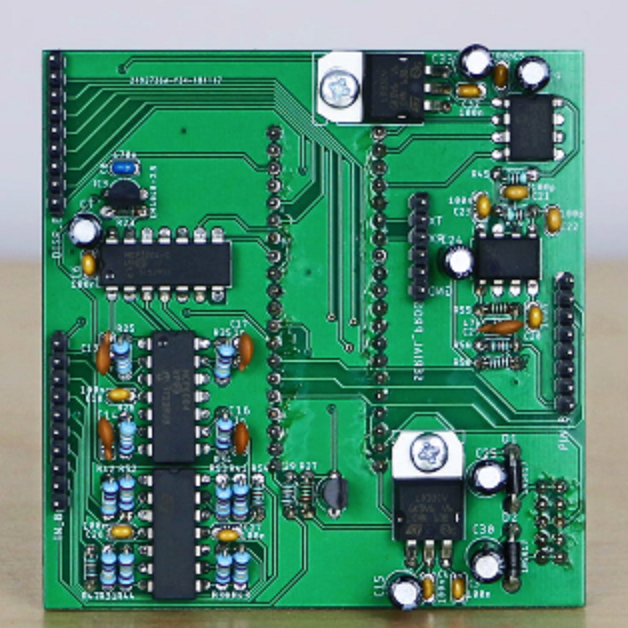
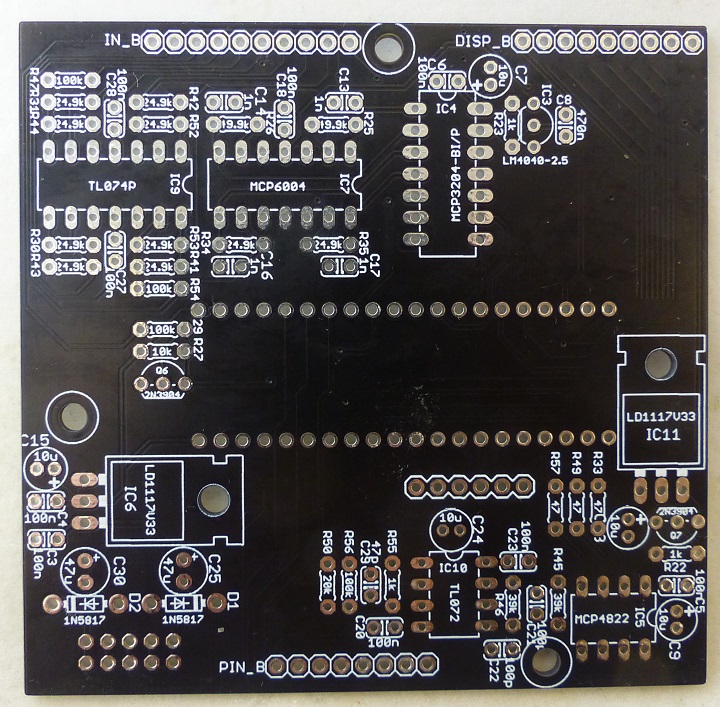
Processing Card
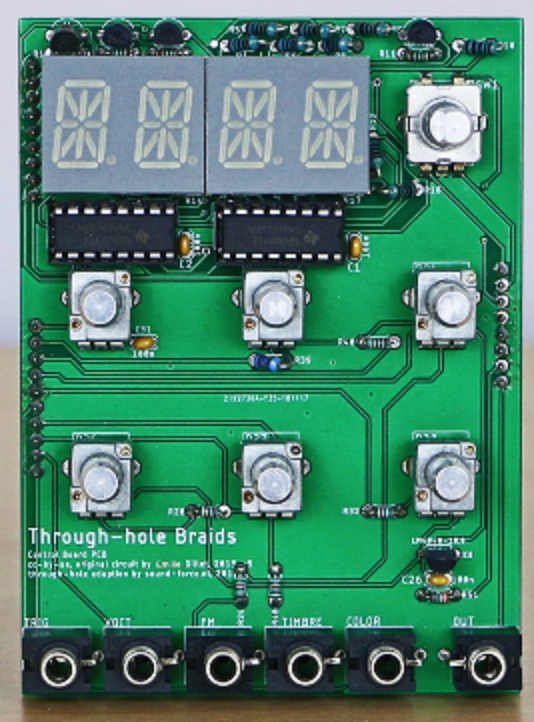
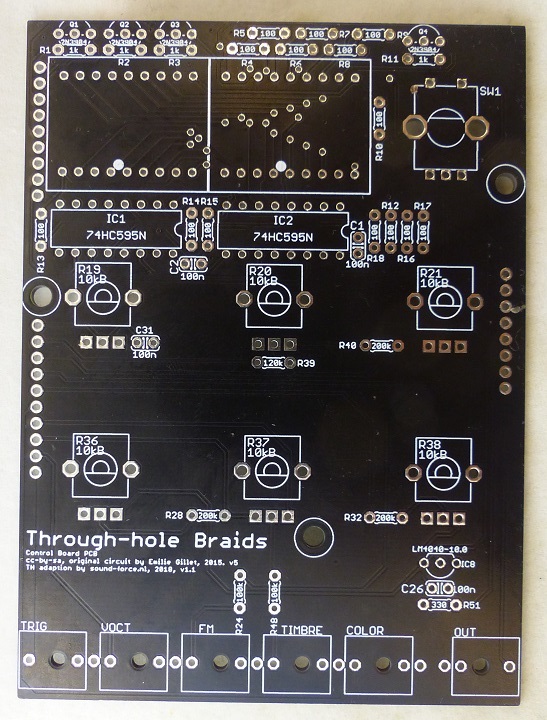
Controls Card
Parts List
| Qty | Index | Desc |
|---|---|---|
| 0 | controls | |
| 14 | R4-R10, R12-R18 | 100 Resistor, 1% |
| 1 | R51 | 330 Resistor, 1% |
| 7 | R1-R3, R11, R22, R23, R55 | 1k Resistor, 1% |
| 1 | R27 | 10k Resistor, 1% |
| 1 | R50 | 20k Resistor, 1% |
| 10 | R30, R31, R34, R35, R41-R44, R52, R53 | 24.9k Resistor, 1% |
| 2 | R45, R46 | 39k Resistor, 1% |
| 2 | R25, R26 | 49.9k Resistor, 1% |
| 6 | R24, R29, R47, R48, R54, R56 | 100k Resistor, 1% |
| 1 | R39 | 120k Resistor, 1% |
| 3 | R28, R32, R40 | 200k Resistor, 1% |
| 3 | R33, R49, R57 (Optional see note, only on Brain 1.2) | 47 Resistor, 1% |
| 1 | C29 | 47p Capacitor, ceramic |
| 2 | C21, C22 | 100p Capacitor, ceramic |
| 4 | C13, C14, C16, C17 | 1n Capacitor, ceramic |
| 13 | C1-C6, C18, C20, C23, C26, C27, C28, C31 | 100n Capacitor, ceramic |
| 1 | C8 | 470n Capacitor, ceramic |
| Capacitors eletrolytic | ||
| 1 | C24 | 10u Capacitor, electrolytic NP |
| 4 | C7, C9, C15, C33 | 10u Capacitor, electrolytic |
| 2 | C25, C30 | 47u Capacitor, electrolytic |
| Diodes | ||
| 2 | D1, D2 | 1N5817 |
| ICs | ||
| 2 | IC1, IC2 | SN74HC595 |
| 1 | IC3 | 2.5V LM4040 Shunt Vref |
| 1 | IC4 | MCP3204 quad 12-bit ADC |
| 1 | IC5 | MCP4822 dual 12-bit DAC |
| 2 | IC6, IC11 | 3.3V LD1117V33 |
| 1 | IC7 | MCP6004 dual op-amp R2R IO |
| 1 | IC8 | 10V LM4040 Shunt Vref |
| 1 | IC9 | TL074 quad op-amp |
| 1 | IC10 | TL072 dual op-amp |
| 6 | Q1-Q4, Q6, Q7 | NPN transistor 2N3904 |
| 1 | UC1 | STM32F103C8T6 NEEDS TO BE 124kb |
| 0 | top | |
| 2 | DISP1, DISP2 | 14 segments 2 characters LED module |
| 6 | COLOR, FM, OUT, TIMBRE, TRIG, VOCT | Vertical jack connector |
| 6 | R19-R21, R36-R38 | 10k linear pot, 15mm shaft |
| 1 | SW1 | Encoder, 24 steps w/ clicks, w/ switch |
| Headers | ||
| Single row male | 1X06, 1X10, 1X8, 1X09 | |
| Single row female | 1X10, 1X8, 1X09, | |
| 2 | Female header for the blue pill (optional) | 1x20 |
| Euro power | 2x05 (Preferably shrouded) | |
| Programmer | ||
| Programmer to program the STM32 board | ||
| Alternative Serial "programmer" | or FTDI's or CH430 |
Videos
