Difference between revisions of "Z80 in 3 Chips"
Jump to navigation
Jump to search
Blwikiadmin (talk | contribs) |
Blwikiadmin (talk | contribs) |
||
| (13 intermediate revisions by the same user not shown) | |||
| Line 35: | Line 35: | ||
== Connectors == | == Connectors == | ||
| + | |||
| + | [[file:Z80_PSOC_Rev3_CAD.PNG]] | ||
=== H1 - I2C Interface === | === H1 - I2C Interface === | ||
| Line 80: | Line 82: | ||
== Software == | == Software == | ||
| + | |||
| + | === Software Configuration === | ||
* Hardware/Software options are set in the PSoC "Hardware_Config.h" file | * Hardware/Software options are set in the PSoC "Hardware_Config.h" file | ||
| Line 90: | Line 94: | ||
*** MULTIBOOT_CPM | *** MULTIBOOT_CPM | ||
| − | === | + | === Operation === |
| − | |||
| − | |||
* Card waits on USB connection | * Card waits on USB connection | ||
* Run PuTTY | * Run PuTTY | ||
| + | ** Baud rate is auto-detected by PSoC | ||
| + | * After PuTTY is running, card boots into Front Panel Control | ||
| + | * LEDs are cycled | ||
* Message | * Message | ||
| + | |||
<pre> | <pre> | ||
Z80_PSoC - Running Front Panel | Z80_PSoC - Running Front Panel | ||
| − | Press SW25 to exit and run Z80 | + | |
| + | SW25 SW26 SW27 SW28 SW29 SW30 SW31 SW32 | ||
| + | Run Mon N/A N/A N/A LDAD STOR INCA | ||
| + | |||
| + | SW17 SW18 SW19 SW20 SW21 SW22 SW23 SW24 | ||
| + | A15 A14 A13 A12 A11 A10 A9 A8 | ||
| + | |||
| + | SW9 SW10 SW11 SW12 SW13 SW14 SW15 SW16 | ||
| + | A7 A6 A5 A4 A3 A2 A1 A0 | ||
| + | |||
| + | SW1 SW2 SW3 SW4 SW5 SW6 SW7 SW7 | ||
| + | D7 D6 D5 D4 D3 D2 D1 D0 | ||
| + | |||
| + | Press SW25 (upper left button) to exit Front Panel and run Z80 | ||
Press SW26 to run Monitor/Test Code | Press SW26 to run Monitor/Test Code | ||
</pre> | </pre> | ||
| − | + | ||
| − | |||
* Options to run Z80 or PSoC Monitor | * Options to run Z80 or PSoC Monitor | ||
** SW32 (Upper right) = Increment address, read | ** SW32 (Upper right) = Increment address, read | ||
** SW31 = Store data, increment address, read data | ** SW31 = Store data, increment address, read data | ||
** SW30 = Load Address, read memory | ** SW30 = Load Address, read memory | ||
| − | |||
| − | |||
| − | |||
** SW26 = Run Monitor | ** SW26 = Run Monitor | ||
** SW25 (Upper Left) = Run Z80 | ** SW25 (Upper Left) = Run Z80 | ||
| + | |||
| + | === Front Panel === | ||
| + | |||
| + | [[file:EightBitFrontPanel720px.JPG]] | ||
| + | |||
| + | <pre> | ||
| + | SW25 SW26 SW27 SW28 SW29 SW30 SW31 SW32 | ||
| + | Run Mon N/A N/A N/A LDAD STOR INCA | ||
| + | |||
| + | SW17 SW18 SW19 SW20 SW21 SW22 SW23 SW24 | ||
| + | A15 A14 A13 A12 A11 A10 A9 A8 | ||
| + | |||
| + | SW9 SW10 SW11 SW12 SW13 SW14 SW15 SW16 | ||
| + | A7 A6 A5 A4 A3 A2 A1 A0 | ||
| + | |||
| + | SW1 SW2 SW3 SW4 SW5 SW6 SW7 SW7 | ||
| + | D7 D6 D5 D4 D3 D2 D1 D0 | ||
| + | </pre> | ||
| + | |||
| + | * Press SW25 (upper left button) to exit Front Panel and run Z80 | ||
| + | * Press SW26 to run Monitor/Test Code | ||
=== Z80_PSoC Monitor === | === Z80_PSoC Monitor === | ||
| Line 118: | Line 154: | ||
* Press SW26 button (one in from upper left) button on [[Front Panel For 8 Bit Computers]] to run the Monitor | * Press SW26 button (one in from upper left) button on [[Front Panel For 8 Bit Computers]] to run the Monitor | ||
* [https://github.com/douggilliland/Retro-Computers/tree/master/Z80/PSOC/PSOC_Design_Files/Z80-PSoC-3-Chips_002 PSoC Code Github repo] | * [https://github.com/douggilliland/Retro-Computers/tree/master/Z80/PSOC/PSOC_Design_Files/Z80-PSoC-3-Chips_002 PSoC Code Github repo] | ||
| + | * SRAM can be examined/changed in SRAM from the Front Panel | ||
<pre> | <pre> | ||
| Line 140: | Line 177: | ||
[[file:Z80_PSoC_Monitor_D_Command.PNG]] | [[file:Z80_PSoC_Monitor_D_Command.PNG]] | ||
| + | |||
| + | * Type X to exit and run Z80 | ||
=== Multiboot Multicomp (MULTIBOOT_CPM) === | === Multiboot Multicomp (MULTIBOOT_CPM) === | ||
| Line 149: | Line 188: | ||
** 115,200 baud | ** 115,200 baud | ||
* Card will power up and cycle through all the LEDs on the Front Panel | * Card will power up and cycle through all the LEDs on the Front Panel | ||
| + | * Address = 0x0000, Data is displayed on LEDs | ||
* Press SW25 (upper left button) on [[Front Panel For 8 Bit Computers]] to run Multiboot software | * Press SW25 (upper left button) on [[Front Panel For 8 Bit Computers]] to run Multiboot software | ||
* PuTTY will display | * PuTTY will display | ||
| Line 155: | Line 195: | ||
</pre> | </pre> | ||
* Press SPACE | * Press SPACE | ||
| − | * Press | + | * Press ? for help menu |
<pre> | <pre> | ||
> | > | ||
Latest revision as of 11:20, 7 September 2022
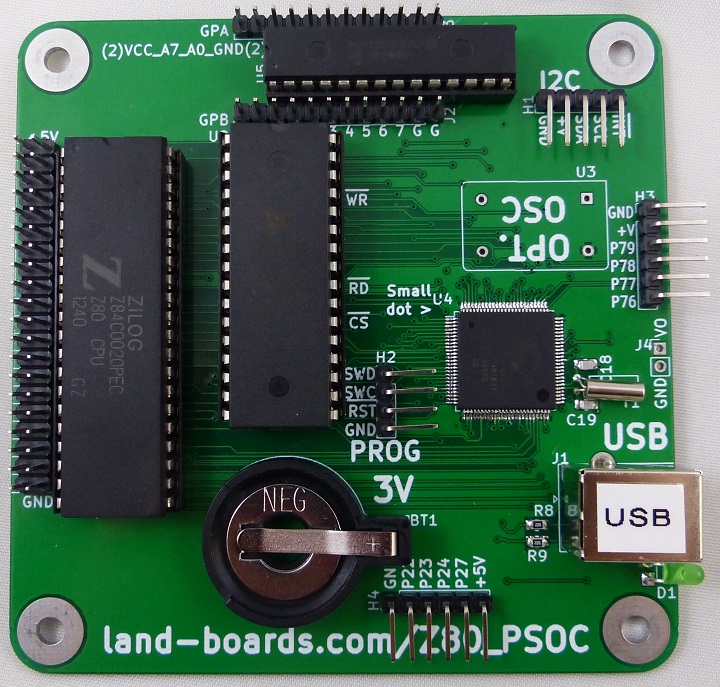
Features
- Z80
- 12.5 MHz operation
- 512KB SRAM
- PSoC5LP
- Z80_PSoC Datasheet - generated from PSoC Creator
- PSoC5 LP emulates standard Z80 peripheral chips
- Serial port with USB
- Memory Management Unit (MMU)
- Controls 512KB SRAM
- Loader moves EPROM code to SRAM
- Controls CPU reset
- Optional MCP23017 16-bit port expander
- I2C Addresses 0x24
- Optional Front Panel
- I2C Addresses 0x20-0x23
- SPI interface for SDHC card
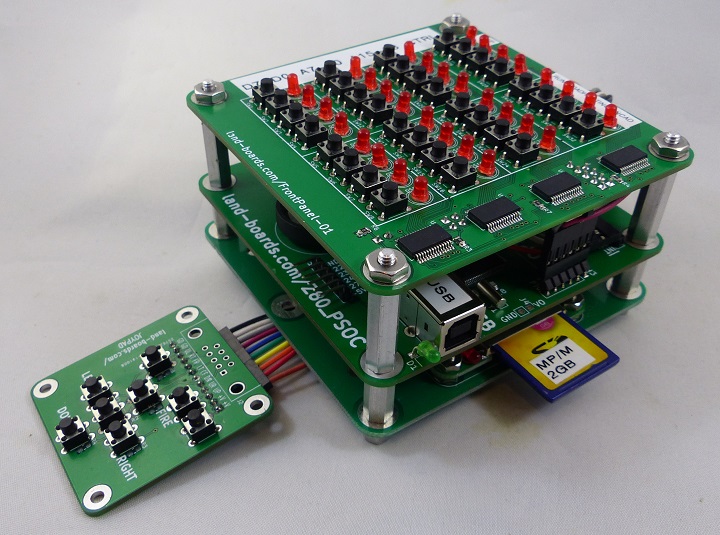
Stackup (top to bottom)
- Front Panel For 8 Bit Computers
- 32 LEDs
- 32 pushbutton switches
- I2C interface
- Z80 in 3 Chips (this card)
- SD_CARD_X49 mounted on CARRIER95TO49MM
- JOYPAD
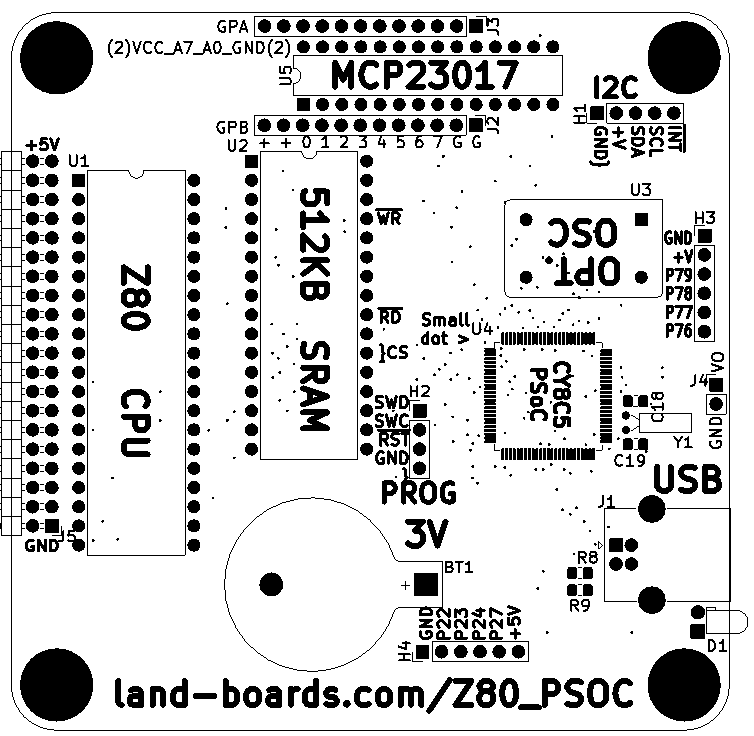
Connectors
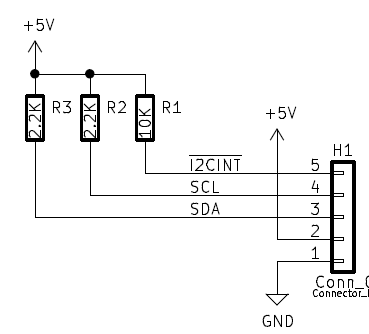
H1 - I2C Interface
- Connects to Front Panel Card via I2C
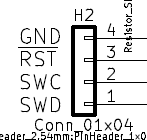
H2 - ISP Download
- Connects to PSoC programmer
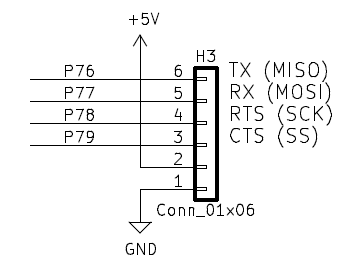
H3- Serial Port or SPI (SD Card)
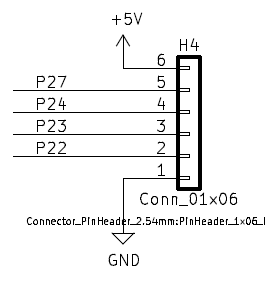
H4 - I/O
J1 - USB B
- 5V card Power
- USB to Serial comm port
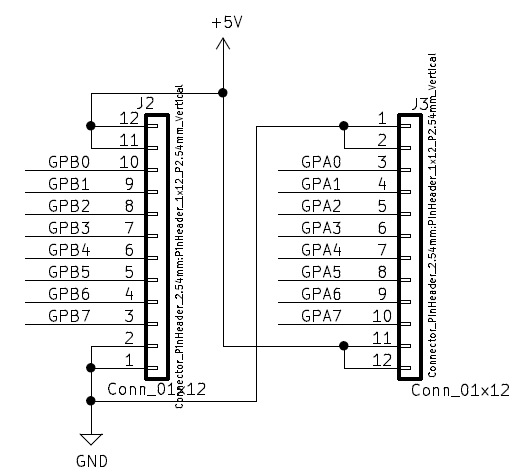
J2, J3 - I/O Ports
- J3 connects to JOYPAD on GPA connector
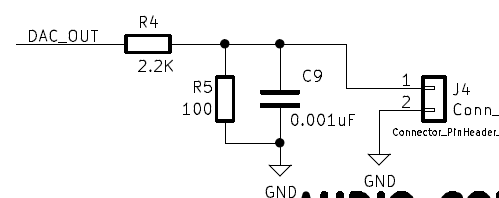
J4 - Audio Out
- DAC is the Analog function generator in the PSoC
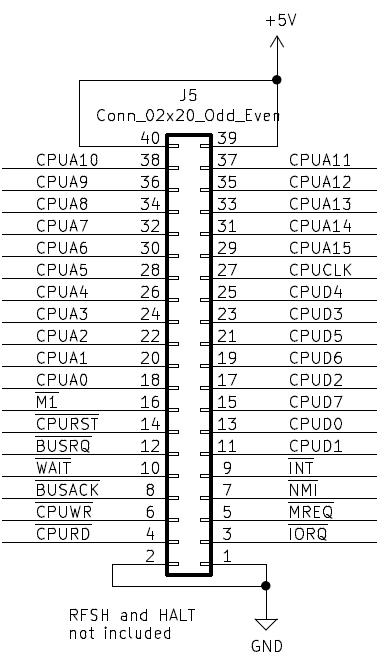
J5 - Z80 Signals
- Useful for monitoring the CPU lines
Software
Software Configuration
- Hardware/Software options are set in the PSoC "Hardware_Config.h" file
- Comment out all but one choice
- Options
- GRANT_9_CHIP_Z80
- GRANT_7_CHIP_Z80
- GRANT_7_CHIP_Z80_STANDALONE
- GRANT_FPGA_CPM
- MULTIBOOT_CPM
Operation
- Card waits on USB connection
- Run PuTTY
- Baud rate is auto-detected by PSoC
- After PuTTY is running, card boots into Front Panel Control
- LEDs are cycled
- Message
Z80_PSoC - Running Front Panel

SW25 SW26 SW27 SW28 SW29 SW30 SW31 SW32
Run  Mon  N/A  N/A  N/A  LDAD STOR INCA

SW17 SW18 SW19 SW20 SW21 SW22 SW23 SW24
A15  A14  A13  A12  A11  A10  A9   A8

SW9  SW10 SW11 SW12 SW13 SW14 SW15 SW16
A7   A6   A5   A4   A3   A2   A1   A0

SW1  SW2  SW3  SW4  SW5  SW6  SW7  SW7
D7   D6   D5   D4   D3   D2   D1   D0

Press SW25 (upper left button) to exit Front Panel and run Z80
Press SW26 to run Monitor/Test Code
- Options to run Z80 or PSoC Monitor
- SW32 (Upper right) = Increment address, read
- SW31 = Store data, increment address, read data
- SW30 = Load Address, read memory
- SW26 = Run Monitor
- SW25 (Upper Left) = Run Z80
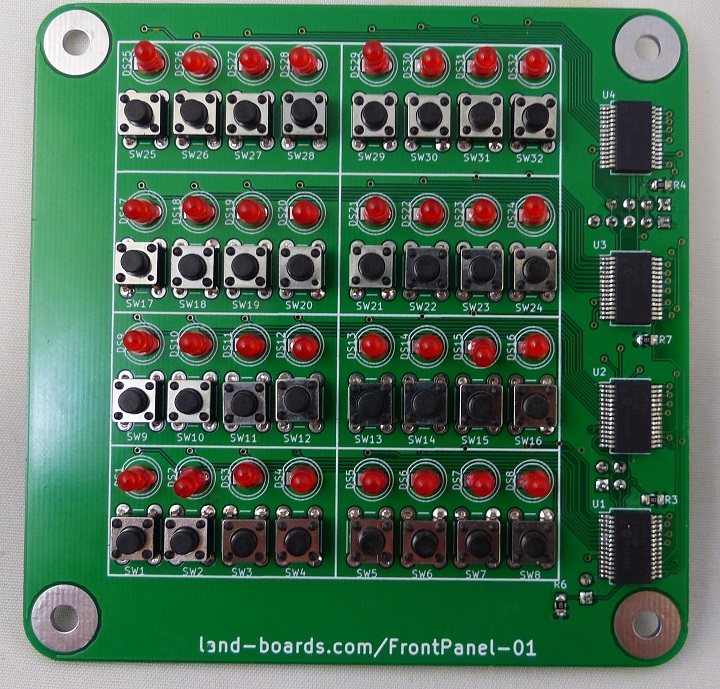
Front Panel
SW25 SW26 SW27 SW28 SW29 SW30 SW31 SW32
Run  Mon  N/A  N/A  N/A  LDAD STOR INCA

SW17 SW18 SW19 SW20 SW21 SW22 SW23 SW24
A15  A14  A13  A12  A11  A10  A9   A8

SW9  SW10 SW11 SW12 SW13 SW14 SW15 SW16
A7   A6   A5   A4   A3   A2   A1   A0

SW1  SW2  SW3  SW4  SW5  SW6  SW7  SW7
D7   D6   D5   D4   D3   D2   D1   D0
- Press SW25 (upper left button) to exit Front Panel and run Z80
- Press SW26 to run Monitor/Test Code
Z80_PSoC Monitor
- Press SW26 button (one in from upper left) button on Front Panel For 8 Bit Computers to run the Monitor
- PSoC Code Github repo
- SRAM can be examined/changed in SRAM from the Front Panel
Land Boards, LLC - Z80_PSoC monitor
I - Initialize SD Card
B - Blink LED
F - Read Front Panel
Rxxxxxxxx - Read sector xxxxxxxx from the SD Card
N - Read next sector from the SD Card
W - Write to the SD Card at 2GB - 1 sector
X - eXit Monitor and run Z80
? - Print this menu
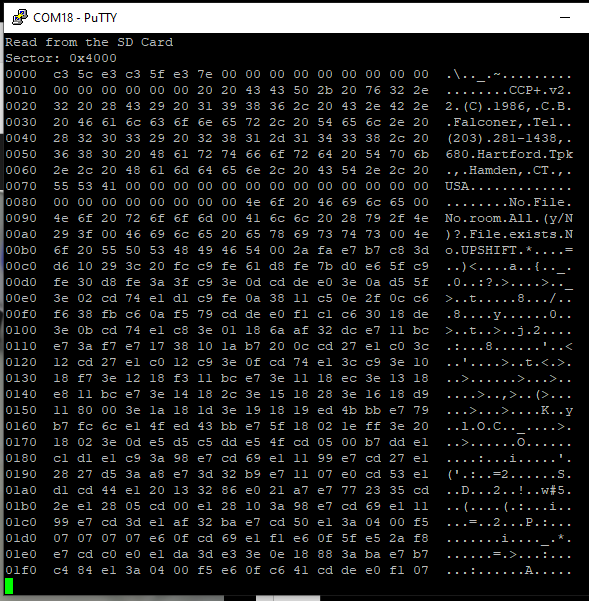
- Type to check the SD card
R4000
- Result:
- Type X to exit and run Z80
Multiboot Multicomp (MULTIBOOT_CPM)
- CP/M Multiboot - Runs MultiComp 512KB SRAM version
- Insert "M/CPM 512KB" SD card
- Insert USB B cable
- Run PuTTY
- 115,200 baud
- Card will power up and cycle through all the LEDs on the Front Panel
- Address = 0x0000, Data is displayed on LEDs
- Press SW25 (upper left button) on Front Panel For 8 Bit Computers to run Multiboot software
- PuTTY will display
Press [SPACE] to activate console
- Press SPACE
- Press ? for help menu
>
  Available Commands:

  :ccxxxxiibbbbbb       Load Intel-Hex file record
  Rxxxx         Run from address xxxx
  Sddd          System boot
  Iddd          Init: Format directory
  Pddd[,xxxx]   PutSys: write system image[,loadaddress]
                (No address: re-use last loadaddress)
  Gddd[,xxxx]   GetSys: load system track

  Dxxxx[,yyyy]  Dump memory from xxxx [,to yyyy]
                D (no address) shows next block
  Cxxxx         Change/show memory at xxxx
                CR advances "," quits

  ddd is a decimal volume number,
  xxxx, yyyy is a hexadecimal address.
  Leading zeros may be omitted.
  ESC or ^C aborts.
Mount Primary Volume
- Type Snnn to select OS at multiboot (loads to A:)
- S1 - Dos+ 2.5 Copyright 1986 (c) by C.B. Falconer, CCP+ Ver. 2.2 (CP/M 2.2 compatible) - wirks
- S2 - Z80 CP/M BIOS 2.20 (c) 1979 by Digital Research - works
- S3 - CP/M Version 3.0 BIOS (2016/9/13) - partly boots/then stops
- S4 - MP/M II V2.1 - partly boots/then stops
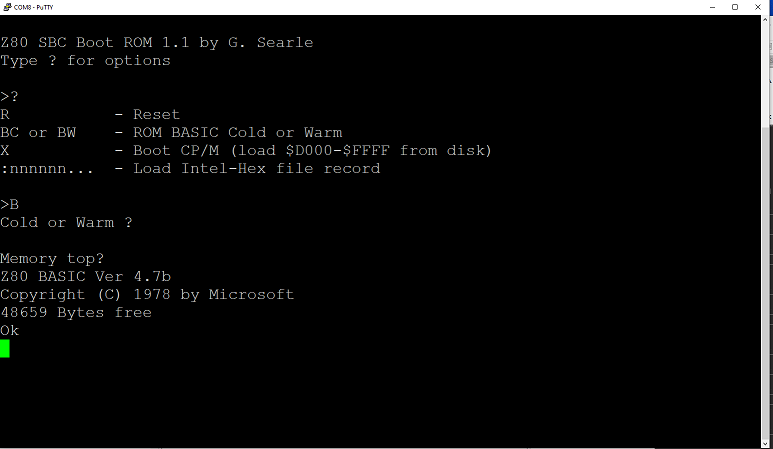
- S5 - Z80 BASIC Ver 4.7b, Copyright (C) 1978 by Microsoft
- 57694 Bytes free
- S6 - ZSDOS v1.1 (c) 1986-8 Harold F. Bower & Cameron W. Cotrill, ZCPR2 (c) 1982 by Richard Conn (CP/M 2.2 compatible)
- Fails to find clock but boots
- S7 - ZCPR compatible system for CP/M+ (CP/M 3.0) by Simeon Cran - works
- SBC-2G-512 on Retrobrewing site - Original author
- GitHub copy of SBC-2G-512
- M: drive is a 892KB RAMDISK (doesn't seem to work)
Mount Additional Volumes
- Mount additional drives using mount command
- mount d vol
- Ex: mount b: 9 will mount ZCPR3 Utilities A-O as drive b:
- Can (re-)mount different volume to same drive with same command
- mount d vol
- Additional Volumes
- Inspired by mc-2g-1024 original but modified
- Sources from here
- Volume.008 - ?
- Volume.009 - ZCPR3 Utilities A-O
- Volume.010 - ZCPR3 Utilities P-Z
- Volume.011 - Wordstar, DBase, SuperCal
- Volume.012 - Games
- Volume.013 - MuMath
- Volume.014 - Documentation
- Volume.015 - Languages (TurboPascal, Fortran, BBC BASIC)
- Volume.016 - Languages (Algol, Aztec C, APL, PLI, FORTH)
- Volume.017 - Languages (BDS Tiny C, Janis Ada15, MS COBOL, PILOT)
- Volume.018-253 - User volumes
Z80 BASIC Ver 4.7b
Reference Designs
Hackaday Page
Videos
