Difference between revisions of "VFO-001"
Jump to navigation
Jump to search
Blwikiadmin (talk | contribs) |
Blwikiadmin (talk | contribs) |
||
| Line 123: | Line 123: | ||
=== Si5351A Drive Level === | === Si5351A Drive Level === | ||
| − | * First, calculate the "theoretical" drive level and then measure the actual level into a 50 ohm load | + | * First, calculate the "theoretical" drive level and then measure the actual drive level into a 50 ohm load |
** Si5351A drives out a 3.3V square wave | ** Si5351A drives out a 3.3V square wave | ||
** Si5351A datasheet lists 50 Ohm source impedance | ** Si5351A datasheet lists 50 Ohm source impedance | ||
Revision as of 11:21, 21 October 2021
Contents
Features
- SDD1306 OLED Display
- I2C Interface
- OLED runs from 3.3V (can run from 5V but this use has 3.3V)
- Rotary Encoder Break Out Board
- Arduino Pro Mini
- Arduino compatible
- 3.3V
- 8 MHz
- Programmed via Arduino IDE
- Download via serial
- Si5351 Oscillator Breakout Board
- 10 KHz - 40 MHz tuning range
- 1Hz/10Hz/100Hz/1KHz/10KHz/100KHz/1MHz/10MHz steps
- I2C Interface
- 3 Outputs
- 27 MHz crystal
- 3.3V operation works without level shifters for I2C*
- Si5351 can only run from 3.3V
- Used right angle headers and Dupont cables for low profile
- 10 KHz - 40 MHz tuning range
- Mini-360 Buck Regulator
- 5V-23V input
- 3.3V output
- Extruded Aluminum Enclosure Box - 94mm x 83mm x 30mm
Schematic
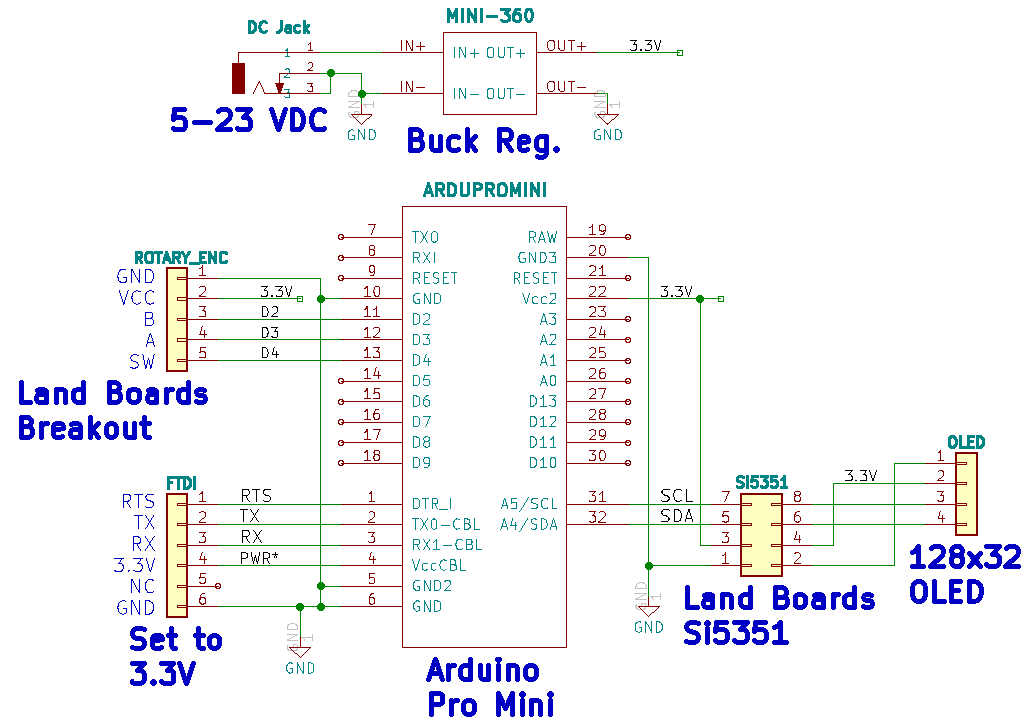
- PWR* - connect only when no Mini-360 Buck Regulator is used
- PD01 - Power Distribution card (not shown)
Build
- Extruded Aluminum Enclosure Box - 94mm x 83mm x 30mm - Out of stock
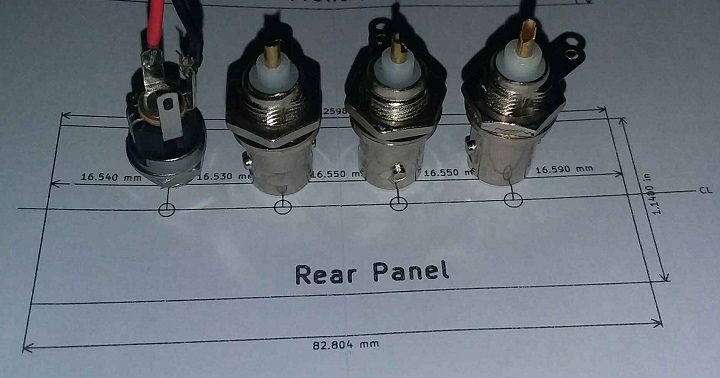
- BNC/Power Jack placement
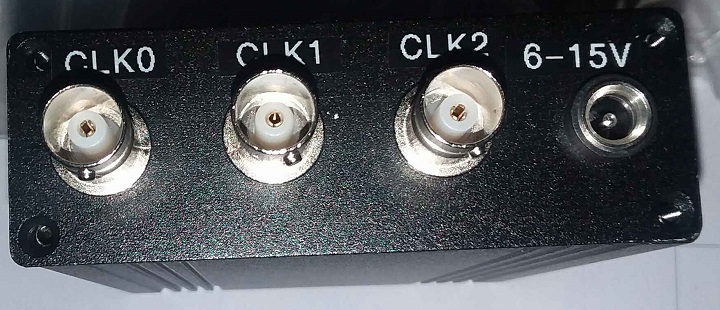
- Rear panel BNCs and power jack
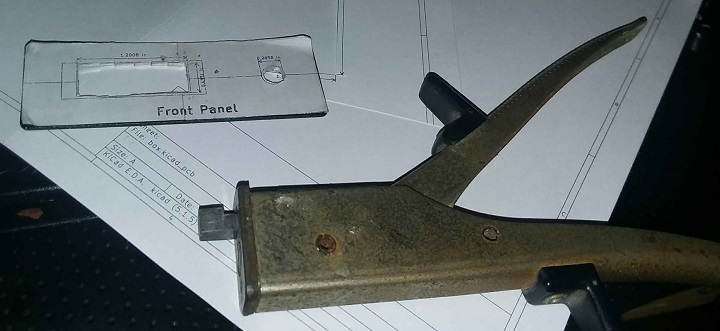
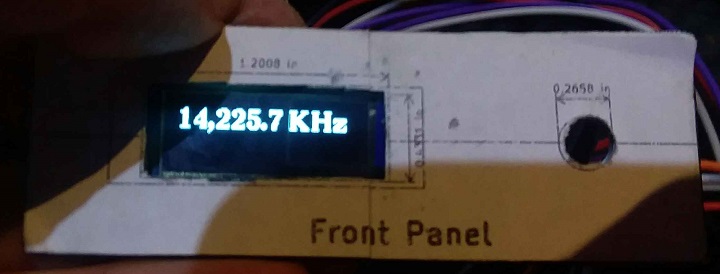
- Drill holes and nibble out for OLED cutout
- A bit rough
- Better to undercut nibble and file to size
- OLED fitted
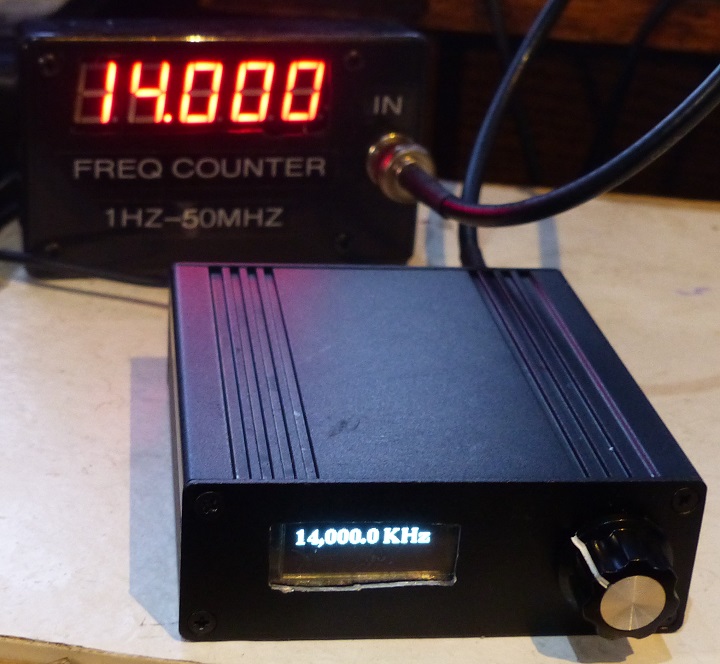
- Final
Libraries/Example Code
Land Boards Code
VFO Menu
- Set Step Size
- 1Hz, 10 Hz, 100 Hz, 1KHz, 10KHz, 100 KHz, 1 MHz, 10 MHz
- Set frequency
- 10 MHz to 40 MHz in step size steps
- Select VFO
- VFO0, VFO1, VFO2
- VFO On/Off
- On, Off
- Drive Level
- 2 mA, 4 mA, 6 mA, 8 mA
- Set Calibration Value
- In step size steps (down to 1 Hz)
- Save [power-on] defaults
Libraries used in this app
- U8g2: Library for monochrome displays, version 2
- Si5351 Library for Arduino
- Rotary Encoder - Software debounced
Other Si5351 Libraries
- Universal Digital VFO Si570/Si5351
- Adafruit_Si5351
- Si5351 Library for avr-gcc
- vk3hn_VFO_controller
- Simple BFO with si5351 controlled by Arduino
- VFO and BFO with Si5351A, OLED and Arduino
Calbration Using WWV
- Good method that doesn't require a frequency counter
- Tune via ear and S meter
- Requires shortwave (or ham) receiver that can receive 5/10/15 MHz
- Rough tune calibration factor on scope or frequency counter
- Fine tune to 1 Hz using WWV
- 15 MHz WWV midday has better resolution
Measurements
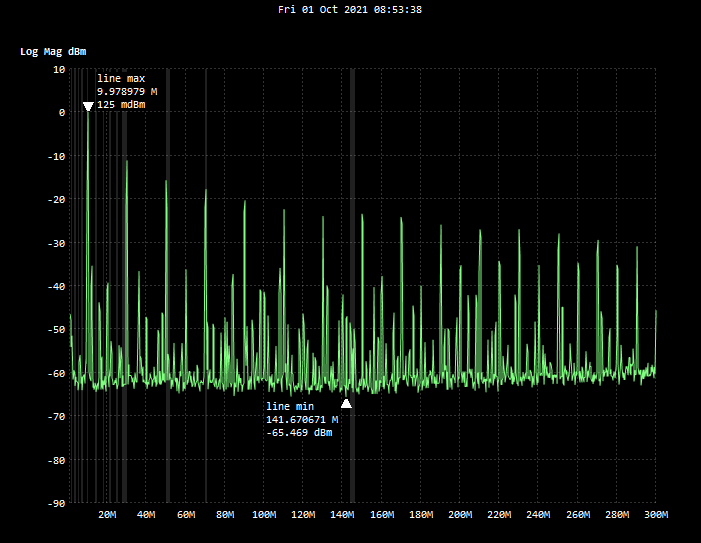
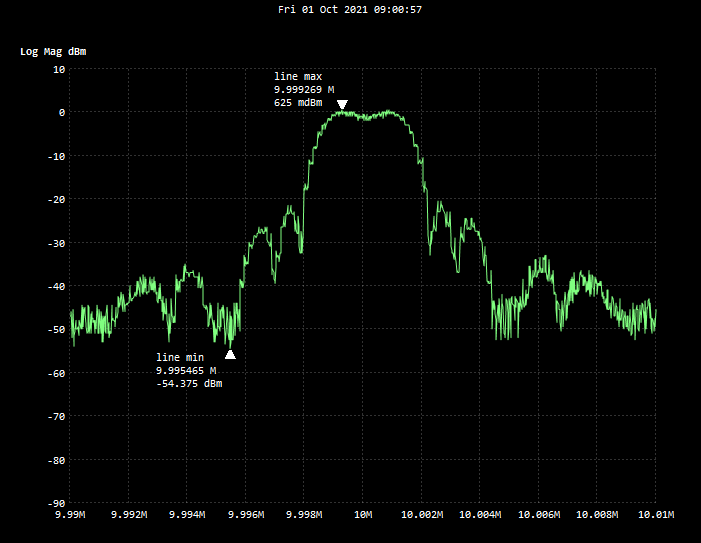
- Channel CLK0
- 10 Mhz
- 30 dB external attenuator (gain set in tinySA to -30dB)
- Scan 1MHz to 300MHz
- Zoom into 10 MHz fundamental
- Approx. 1 dBm signal level
Si5351A Drive Level
- First, calculate the "theoretical" drive level and then measure the actual drive level into a 50 ohm load
- Si5351A drives out a 3.3V square wave
- Si5351A datasheet lists 50 Ohm source impedance
- Half of the power would be dissipated in the source
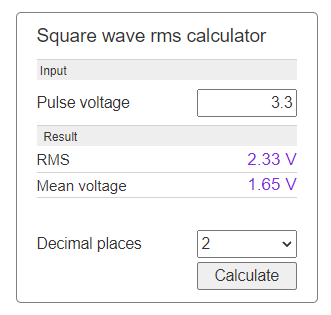
- The RMS value is for square-wave voltages whose pulse duration (ti) and pause (tp) have the same length:
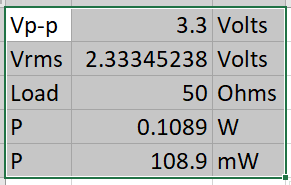
- "Theoretical" drive level of 3.3V
- 109 mW would be 20/3 dBm total power
- Half delivered to load = 54.5 mW
- 17.4 dBm
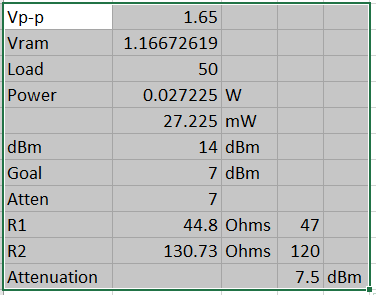
- ADE-1 needs +7 dBm level
- Would in theory need a 10 dB attenuator
- Output drive in the Si5351A is controlled by the output drive control register
- Si5351A outputs measured with tinySA
- Drive Level 2 mA = 0.2 dBm
- Drive Level 4 mA = 6.2 dBm < Best choice for driving +7 dBm mixers like the ADE-1
- Drive Level 6 mA = 9.7 dBm
- Drive Level 8 mA = 11.7 dBm
Drive of 3.3V with 50 Ohms source/load impedances
Videos
