3DPrinting
Jump to navigation
Jump to search
Contents
Welcome to Our 3D Printer Page
We looked at a few different popular 3D printers at the 2012 Mini Maker Faire in Pittsburgh, PA. Many of them were Reprap style printers.
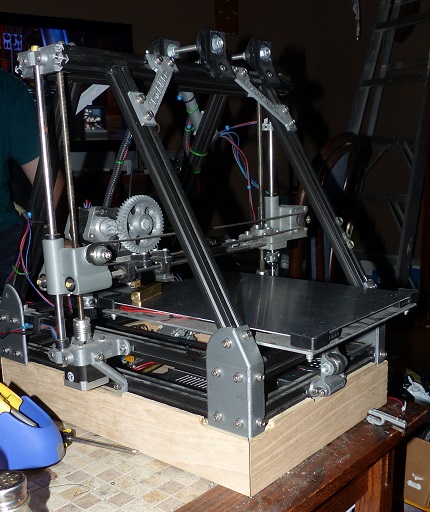
After talking with the Makers there, we decided to make a MendelMax 1.5 3D printer (inspired by this one).
Bill of Materials
The vendors of complete kits were out of available stock so I bought individual parts myself based on the MendelMax 1.5 Bill of Materials Here are the parts that I ordered along with notes and caveats.
Here is some of the software to use the 3D printer.
Y-Axis Linear Rail System (MendelMax 1.5+)
Y-Axis Upgrade (Jan-Feb 2016)
In Jan 2016 we upgraded to Utilbots Linear Y-Axis design
This kit includes:
- igus Drylin linear rail
- igus Drylin Carriers (x4)
- Misumi 2020 Extrusion
- Misumi Corner Brackets (x4)
- Aluminum 3.2mm Laser cut plate with Rivit Nuts 250x320mm
- Borofloat Borosilicate Glass 250x320mm
- Aluminum Heat Spreader .08" 250x320mm
- 24v Kapton Heater 240x310mm
- Fastenal Stainless Steel Hardware
- Set of 4 Springy Corner Brackets
- Utilbots y axis upgrade-640px.jpg
RAMPS Changes for 24V Heated Bed
The following is taken from Instructions to run bed at 24V
- Replace MFR1100 with a fuse rated for 24V
- Choose one of the following:
- Remove LED2 or R23. You will lose the LED that indicates when the heated bed is being powered, but the RigidBot heated bed includes several LEDs around the perimeter of the bed.
- Replace R23 with an approximately 3.6k ohm 1/8W resistor.
- Attach a ~300W (~12A) 24V power supply with the positive lead to X4-1 and the ground lead to X4-2
- Assuming here that board manufacturer used the appropriate Q3 MOSFET, STP55NF06L, which is rated for 60V and 30A or more.
Printed Parts
- The basic parts (some are replaced by parts below)
- Extruder
- Extruder based on Wade's Geared Extruder
- X-Carriage
- X-Ends
- 8 to 10 mm adapters for z-axis
Our Build
Still on the ground
General Information
Build Instructions
- MendelMax Build Videos by 3DPrinterTek.com
- Threaded Rod Cut List
- TechPalladin Build Guide
- Start of the build
- Reprap Build Instructions
- Extracted Extrusion Instructions
- Heatbed Assembly and Mounting
- Photos of Parts
- 3D picture
- Prusa Mendel Assembly
- Heated Bed Assembly
- MENDELMAX - Quick-fit X and Quick-fit Extruder
- Hot End Assembly
- Breakthrough on getting parts to stick to the Printer bed
