Difference between revisions of "NanoVNA"
Jump to navigation
Jump to search
Blwikiadmin (talk | contribs) |
Blwikiadmin (talk | contribs) |
||
| Line 41: | Line 41: | ||
* [https://www.youtube.com/watch?v=f-qJIjaFIrs NANOVNA LP Low Pass Filter] - IMSAI Guy | * [https://www.youtube.com/watch?v=f-qJIjaFIrs NANOVNA LP Low Pass Filter] - IMSAI Guy | ||
* [https://www.youtube.com/watch?v=GJNMnq8eD0E The NanoVNA, Viewer Questions and Answers] - joe smith | * [https://www.youtube.com/watch?v=GJNMnq8eD0E The NanoVNA, Viewer Questions and Answers] - joe smith | ||
| + | * [https://www.youtube.com/watch?v=v01lSgWo904 Using the NanoVNA to Create SPICE Models for Simulation] | ||
* [https://www.youtube.com/watch?v=TsXd6GktlYQ Basics of the Smith Chart - Intro, impedance, VSWR, transmission lines, matching] - W2AEW | * [https://www.youtube.com/watch?v=TsXd6GktlYQ Basics of the Smith Chart - Intro, impedance, VSWR, transmission lines, matching] - W2AEW | ||
* [https://www.youtube.com/watch?v=R5iYuGLvlas NanoVNA To Test The Loss & Length Of Coax Cables] - Jim W6LG YouTube Elmer for Ham Radio Basics | * [https://www.youtube.com/watch?v=R5iYuGLvlas NanoVNA To Test The Loss & Length Of Coax Cables] - Jim W6LG YouTube Elmer for Ham Radio Basics | ||
Revision as of 14:28, 25 April 2020
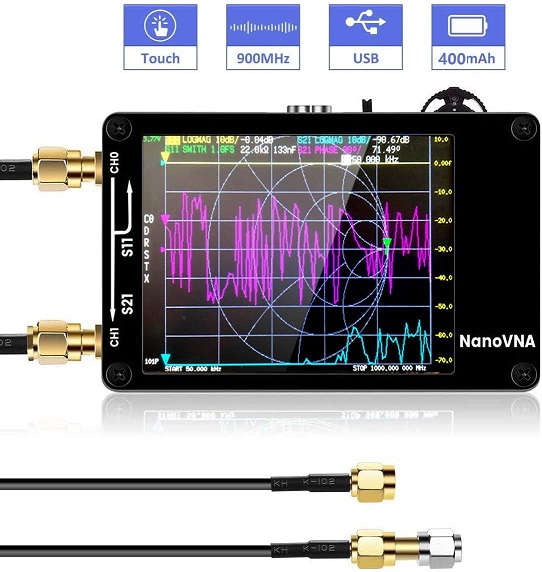
NanoVNA - Network Analyzer
Specifications
- Number of Calibration Points: 101 (Fixed)
- Number of Scanning Points: 101 (Fixed)
- Display Tracking: 4, Marking: 4, Save Setting : 5
- PCB: 54mm x 85.5mm x 11mm (without the size of connectors, switches)
- Measurement Frequency: 50KHz ~ 300MHz (50KHz -900MHz, enable extended firmware)
- RF Output: -13dbm (maximum -9dbm)
- Frequency Accuracy: 0.5ppm
- Measurement Range: 70dB (50kHz-300MHz), 50dB (300M-600MHz), 40dB (600M-900MHz) enable extended firmware)
- Port SWR: 1.1
- Display: 2.8 inch TFT (320 x240)
- USB Interface: USB Type-C; Communications Mode: CDC (Serial)
- Power Supply: USB 5V 120mA, built-in 400mAh electricity, maximum charging current 0.8A
- nanovna users nanovna-users@groups.io
- Amazon links
Adding a battery
- My unit did not come with a battery
- Added an ST connector and an 850 mAh LiPo battery
- The pinout on the card was backwards from the pinout of the connector at the end of the battery wires
- Removed the pins from the battery wire connector and flipped the pins
- Charging looks like it's working
- Battery is a bit too thick to screw the back on completely
- May want to switch to larger standoffs
- Someone else's page (they added an inline connector and wired to the card)
YouTube Videos
- NanoVNA a $50-$70 Amateur Radio Antenna Analyzer? - Ham Radio Crash Course
- NanoVNA Initial Observations - W0QE
- The NanoVNA, a beginners guide to the Vector Network Analyzer - joe smith
- NanoVNA Vector Network analyzer 900MHz VNA for $50 - IMSAI Guy
- NANOVNA LP Low Pass Filter - IMSAI Guy
- The NanoVNA, Viewer Questions and Answers - joe smith
- Using the NanoVNA to Create SPICE Models for Simulation
- Basics of the Smith Chart - Intro, impedance, VSWR, transmission lines, matching - W2AEW
- NanoVNA To Test The Loss & Length Of Coax Cables - Jim W6LG YouTube Elmer for Ham Radio Basics
