RPI-MDI
Contents
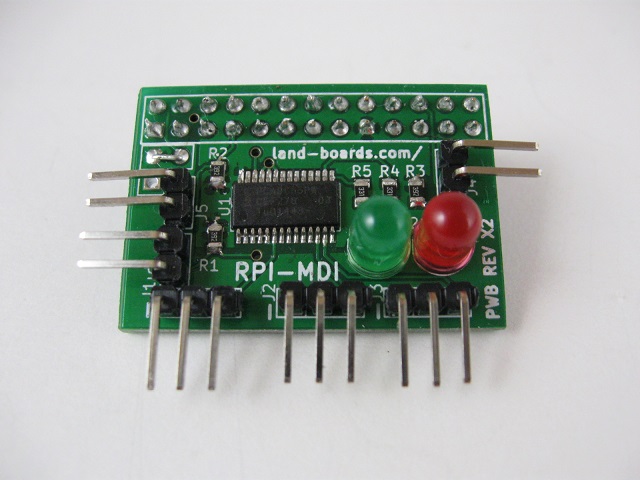
Raspberry Pi Servo Card
Features
- Raspberry Pi daughtercard
- Fits on "old" Model B or "new" Model B Plus board
- Three axis Servo PWM outputs (Servos not included)
- Two PWM Controlled LEDs
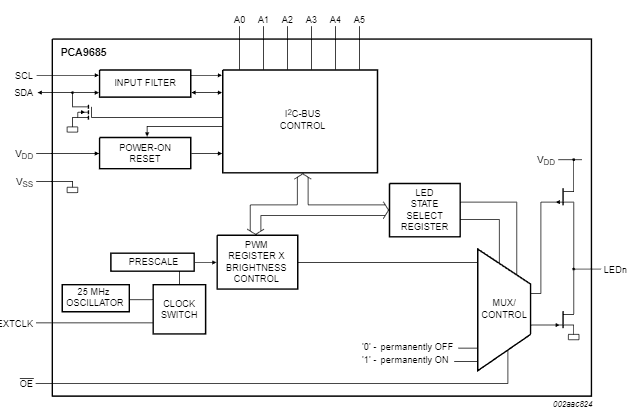
- I2C controlled 16-channel PWM controller PCA9685
- 5 channels used as above (Three Servo outputs, 2 LED outputs)
- PWM controller has internal built-in clock generator - no refresh required
- Even though the Raspberry Pi has 3.3V I/O, the PWM outputs run at 5V - compatible with typical servos
- Three switch inputs with on-board pull-ups which can be used as GPIO lines
- 3X of 10 uF SMT capacitors on rear of board for PWM/Servo noise reduction
- Right angle connectors for Low Profile
- Recessed connectors for side connectors for smallest form factor
- Very small size 1.4" x 1"
- Jumper to use 5V from Raspberry Pi (if your power supply has sufficient capacity) or pads for external power or additional capacitance if needed
- Python PWM - Adafruit driver
PCA9685 Block Diagram
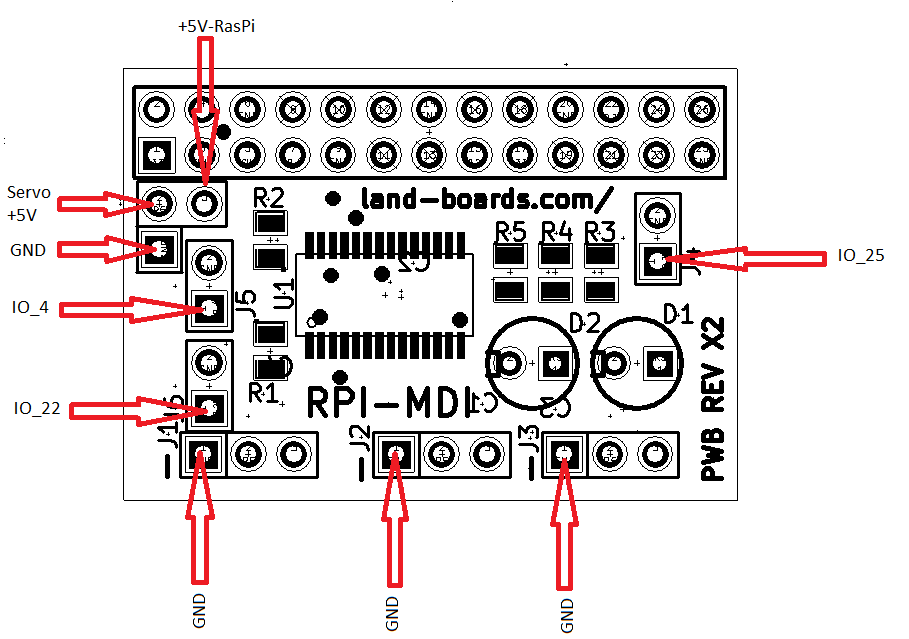
Connectors
- Marking is nearest pin 1
- Pin 1 is a square pin
J1 - Servo Output 1 - PWM_LED0 pin on IC
- J1-1 = GND
- J1-2 = VCC (+5V)
- J1-3 = PWM output line
J2 - Servo Output 2 - PWM_LED6 pin on IC
- J2-1 = GND
- J2-2 = VCC (+5V)
- J2-3 = PWM output line
J3 - Servo Output 3 - PWM_LED7 pin on IC
- J3-1 = GND
- J3-2 = VCC (+5V)
- J3-3 = PWM output line
J4 - Switch Input 1 - GPIO_25
- J4-1 = GPIO_25
- J4-2 = GND
J5 - Switch Input 2 - GPIO_4
- J5-1 = GPIO_4
- J5-2 = GND
J6 - Switch Input 3 - GPIO_22
- J6-1 = GPIO_22
- J6-2 = GND
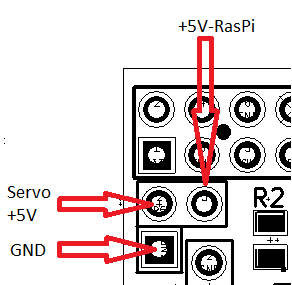
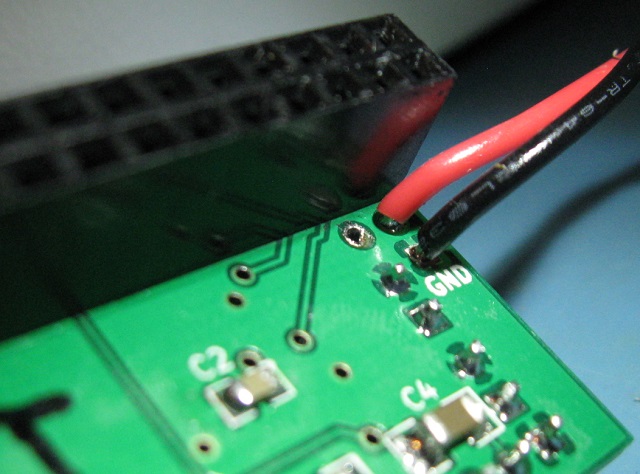
Power/capacitance connector
- This is a three pin L shaped connector located in the following corner of the board.
- Ground
- Servo +5V
- +5V-Raspberry Pi
Power Notes
If your Raspberry Pi +5V power supply has enough current capacity to drive the Pi and your servos then jumper Pins 2 to 3 (the board is shipped in this configuration by default). This will power the Servos from your Raspberry Pi. If when you run servos your Pi crashes it may be from the current draw of the Servos and you will need to consider one of the following options.
If your Raspberry Pi +5V power supply has enough current capacity to drive the Pi and your servos but the voltage drops and your Pi drops out then you may be able to add a capacitor between pin 2 (+ side of your cap) and pin 1 (Ground side of your cap). If your Raspberry Pi +5V power supply does not have enough current capacity to drive the Pi and your servos then remove the jumper between pins 2 to 3. Add external power between pin 2 (+ side of cap) and pin 1 (Ground).
Indicators
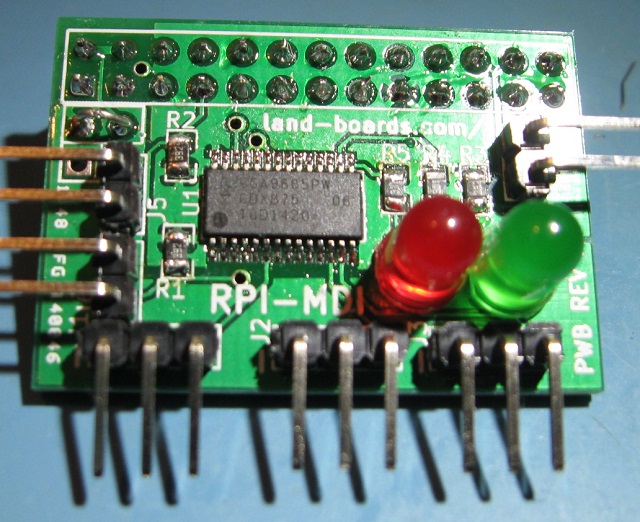
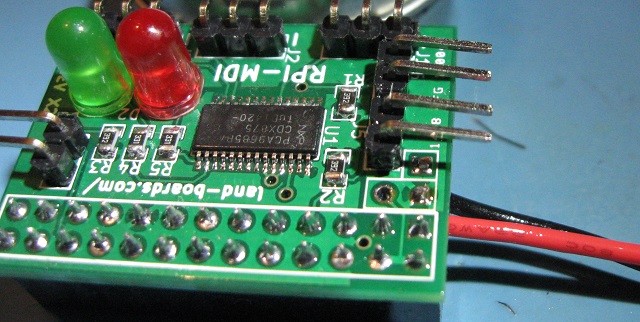
- D1 - LED connected to PWM-LED9
- D2 - LED connected to PWM-LED8
Servo Current Draw
Engineering Equations
- q = I * T
- q = C * V
- I * T = C * V
- and
- C = (I * T) / V
- q is the charge (in Coulombs) - divided out in formulas
- I is current (in Amps)
- t is time (in Seconds)
- C is capacitance (in Farads)
- V is the voltage droop (in Volts)
Using the typical values:
- I = 0.5A
- V = 0.25V (allowable voltage drop)
- t = 0.02 secs (50 Hz)
Solving for C:
- C = 0.5 * .02 / 0.25 = 2,500 uF per channel
External Links
- Peak Servo Current Tests - Measured Servo Current Draws
RPI Setup
- Based on Adafruit PCA9685 Tutorial
sudo apt-get update
sudo apt-get upgrade
sudo apt-get install python-smbus
sudo apt-get install i2c-tools
- On Raspbian comment out "blacklist i2c-bcm2708" in /etc/modprobe.d/raspi-blacklist.conf
sudo nano /etc/modprobe.d/raspi-blacklist.conf
- Add the following lines to /etc/modules
i2c-dev
i2c-bcm2708
Schematic
Drivers/Example Code
- Github repo - Driver code

