Difference between revisions of "Screwduino"
Jump to navigation
Jump to search
Blwikiadmin (talk | contribs) |
Blwikiadmin (talk | contribs) |
||
| Line 89: | Line 89: | ||
== Screwduino Schematic == | == Screwduino Schematic == | ||
| − | [ Screwduino Schematic] | + | [http://land-boards.com/Screwduino/Screwduino-X3-Schematic.pdf Screwduino Schematic] |
== Screwduino Layout == | == Screwduino Layout == | ||
Revision as of 13:55, 10 January 2020
Contents
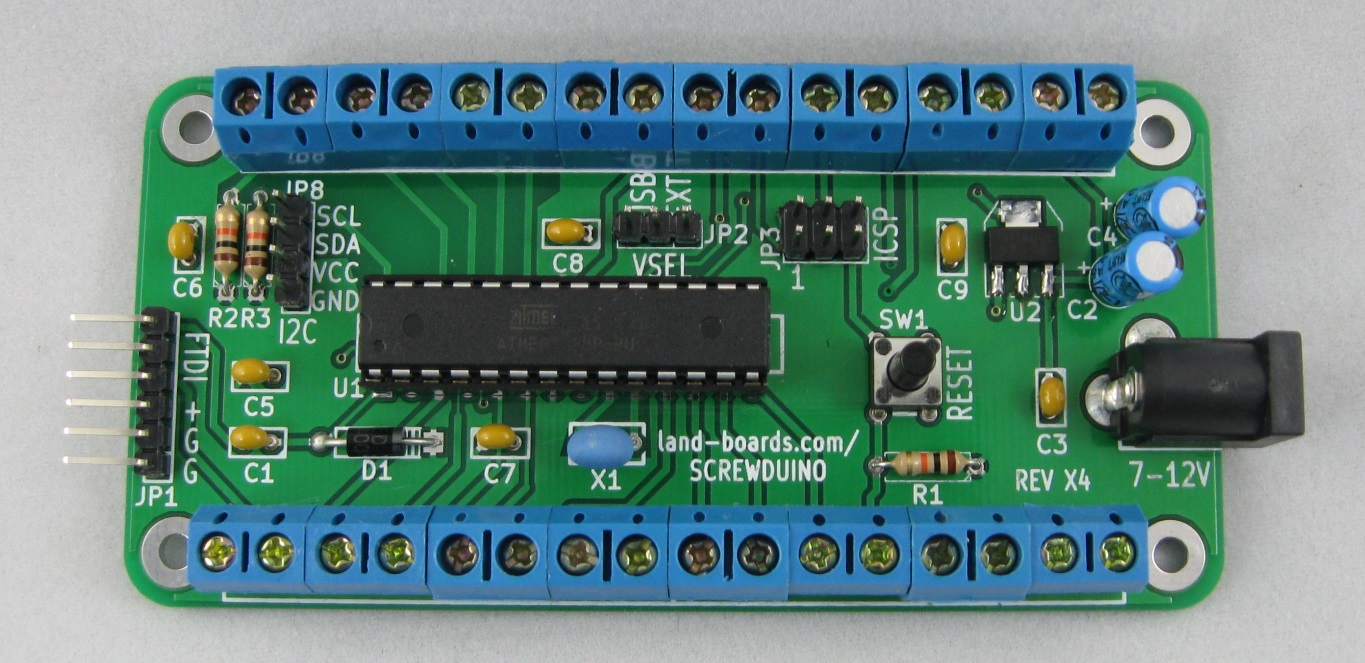
Features
- Arduino UNO compatible
- Arduino UNO bootloader
- Select UNO in Arduino IDE to download card
- No USB connector/chip.
- Use a FTDI download cable or FTDI to USB interface for USB (not supplied)
- ICSP header for download
- 4-pin I2C connector for easy attachment of an I2C LCD display and other I2C sensors (like temperature sensors).
- Beware there are many different I2C pinouts.
- Added 10K ohm pullup resistors (R3 and R4) from the I2C SDA/SCL to +5V
- If the user doesn't want the resistors, they can snip them out of the circuit
- Uses through hole parts so that it is easier to assemble.
- The sole exception is the voltage regulator which is surface mount for heat transfer
- 5mm pitch screw terminal blocks.
- Reset switch.
- 7-12V DC on standard 2.1mm DC power connector
- Power selection jumper (FTDI, Regulator, Screw Terminals)
- Four (4) good mounting holes that take 4-40 screws and have more than enough clearance for screw heads, standoffs and/or nuts.
Design Advantages
Gets away from all of the painful wire jumpers and pins that constantly come loose. Makes the step from prototype to final design much easier.
| Method | Material Costs | Labor Tasks | Power/Ground pins | Wires secure? | Mounting | I2C Support |
|---|---|---|---|---|---|---|
| Processor | UNO - $30 | Strip wires and solder to parts | 3 GND1 PWR | Wires don't stay in holes with any stress. | Poor | No connector |
| Breadboards | Uno - $30 +Breadboard $10 | Strip wires or use breadboard wires | 120 each PWR/GND for 700 point breadboard | Moderately secure since the holes are usually “tight” | Poor | No connector |
| ProtoShields | Uno - $30 +Shields - $15 | Lot of time- consuming soldering of custom wiring | Vary but usually enough although maybe not connectorized in the best use | Wires typically soldered so secure | Poor | No connector |
| Sensor Shields | Uno - $30 +Shields - $15 | Use custom wires | Excellent at 1 per Arduino Digital/Analog pin | Connectors are secure | Poor | Yes |
| Screw Wings | Uno - $30 + Wing Shield - $15 | Strip wires and solder to parts | Varies depending upon shield | Connections very secure | Poor | No connector |
| Screwduino | $30 (est) | Strip wires and solder to parts | 5 – Ground 4 – PowerAdditional on other connectors | Connections very secure | Excellent | Yes |
Screwduino Schematic
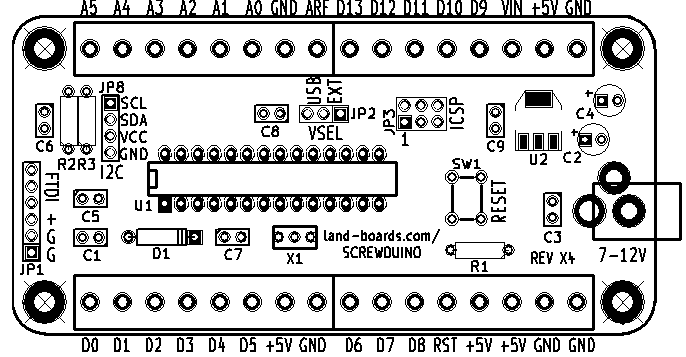
Screwduino Layout
Power
Measured 15 mA with 9V external power input (no loads but running program).
Card Power Source - VSEL Jumper
- This jumper selects the power source for the card
- Install jumper across the USB pins to power the card from the FTDI interface.
- Install jumper across the EXT pins to power the card from the DC jack.
- Leave the jumper off when powering the card from the ISP connector.


