Difference between revisions of "PiPicoMite01"
Blwikiadmin (talk | contribs) (→Rev 1) |
Blwikiadmin (talk | contribs) (→Rev 1) |
||
| Line 547: | Line 547: | ||
* Add wire Pico pin 19 to U2-13 (GP14) (or etch that went to Pico pin 20) | * Add wire Pico pin 19 to U2-13 (GP14) (or etch that went to Pico pin 20) | ||
* Add wire Pico pin 20 to U2-12 (GP15) (or etch that went to Pico pin 19) | * Add wire Pico pin 20 to U2-12 (GP15) (or etch that went to Pico pin 19) | ||
| + | |||
| + | [[file:PicoMite01_X1_Rework_I2C2.PNG]] | ||
== Assembly Sheet == | == Assembly Sheet == | ||
* [[PicoMite01 Rev1 Assembly Sheet]] | * [[PicoMite01 Rev1 Assembly Sheet]] | ||
Revision as of 19:55, 18 May 2022
Contents
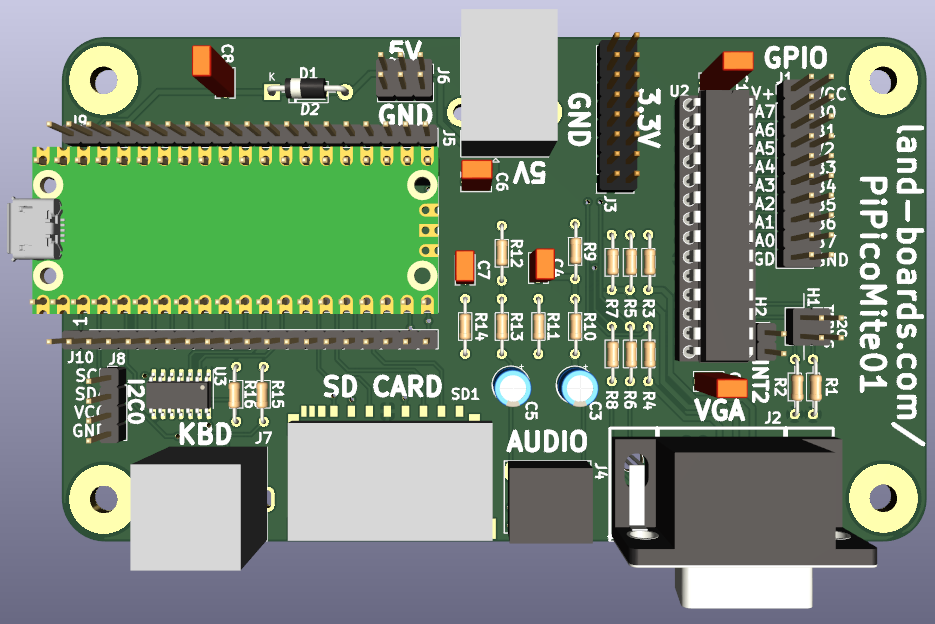
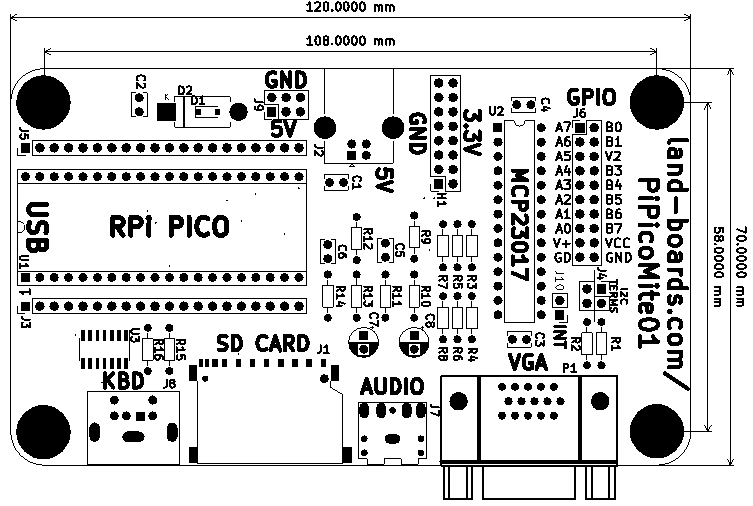
Features
- Raspberry Pi Pico
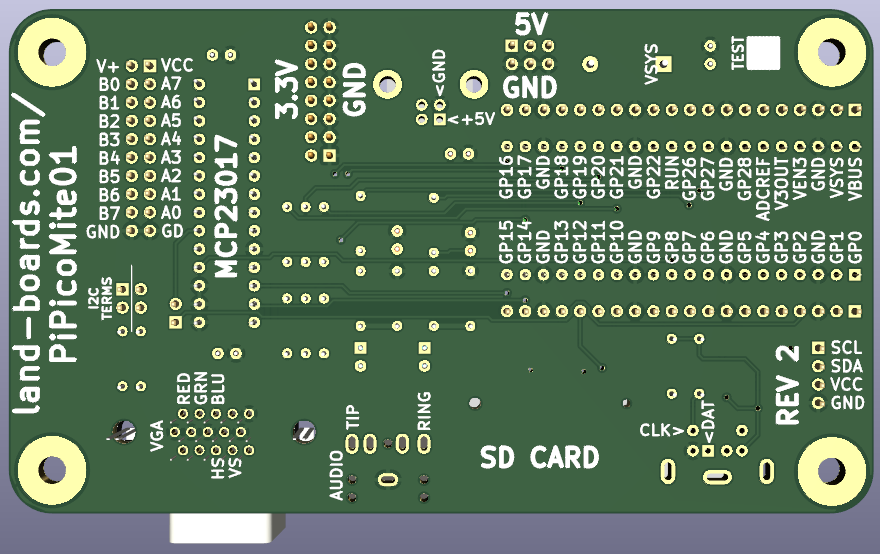
- All pins brought to header
- Pin marking on rear
- VGA (1:2:1 - R:G:B) - 16 colors
- PS/2 Keyboard
- 5V to keyboard with voltage translator
- Does not require a keyboard that runs at 3.3V
- SD Card
- Full size card
- Up to 32GB
- Stereo audio
- 3.5mm jack
- 16-bit GPIO
- MCP23017 port expander
- I2C1
- 2x10 0.1" pitch header
- Jumper selectable terminators
- Power options
- 5V power input via USB B or 0.1" pitch header
- 3.3V output header
- 120mmx70mm outline
- (4) 6-32 Mounting holes
BASIC Interpreter
The PicoMiteVGA boots straight into the MMBasic prompt. At which point you can enter, edit and save the program, test BASIC commands and run the program.
MMBasic is a Microsoft BASIC compatible implementation of the BASIC language. It is full featured with floating point, 64-bit integers and string variables, long variable names, arrays of floats, integers or strings with multiple dimensions, extensive string handling and user defined subroutines and functions. Typically it will execute a program up to 100,000 lines per second. Embedded compiled C programs can be used for even higher performance.
Using MMBasic you can use communications protocols such as I2C or SPI to get data from a variety of sensors. You can save data to an SD card, measure voltages, detect digital inputs and drive output pins to turn on lights, relays, etc.
The emphasis with MMBasic is on ease of use and development. The development cycle is very fast with the ability to instantly switch from edit to run. Errors are listed in plain English and when an error does occur a single keystroke will invoke the built in editor with the cursor positioned on the line that caused the error.
Pin Marking on Rear
Schematic
Connectors
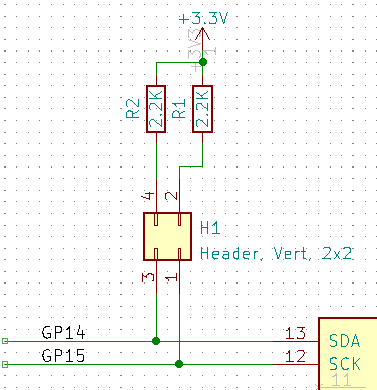
H1 - I2C2 Terminators
- Install shunts to terminate SDA, SCL signals
- Commands
SETPIN GP14, GP15, I2C2
I2C2 OPEN 400, 100
I2C2 WRITE &H20, OC, LEN, B0 [, B1...]
I2C2 READ &H20, OX, LEN, BUFF()
- &H20 - I2C Address 0x20
- OC: 0=terminate after, 1=chain next
- len - Length of buffer (normally 1 for receive)
- B0,B1... Bytes to send
- BUFF() - receive buffer
J1 - I2C Interrupt
- Install jumper to connect INTA interrupt from MCP23008 to GP0
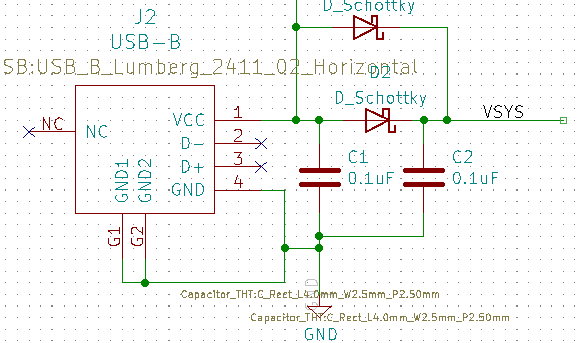
J2 - USB B Power Connectors
- Full size USB B connector
- No USB signal connections, just used for power
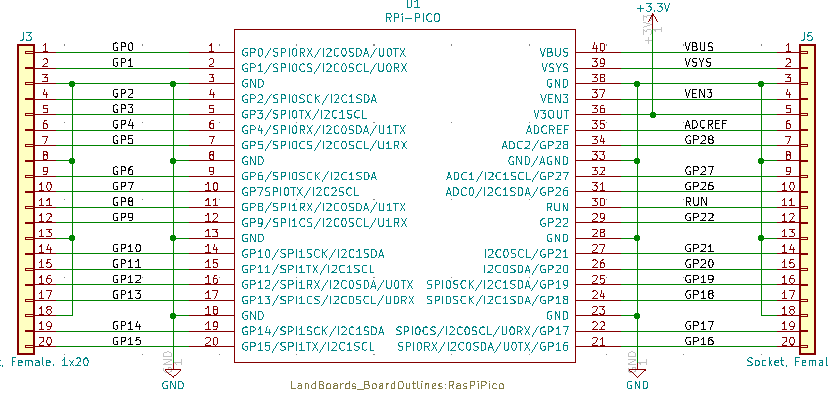
J3/J5 Pico Connectors
| GP | FUNCTION | PICO PIN |
|---|---|---|
| GP6 | AUDIO-L | 9 |
| GP7 | AUDIO-R | 10 |
| GND | AUDIO-GND | 8 |
| 3.3V | PS2_3.3V | |
| VSYS | PS2_5V | 39 |
| GP8 | PS2_CLK | 11 |
| GP9 | PS2_DATA | 12 |
| GND | PS2_GND | 13 |
| 3.3V | SD_3.3V | |
| GP12 | SD_MISO | 16 |
| GP11 | SD_MOSI | 15 |
| GP10 | SD_SCK | 14 |
| GP13 | SD_SLVSEL | 17 |
| GND | SD_GND | 18 |
| GP18 | VGA_BLU | 24 |
| GND | VGA_GND | 23 |
| GP20 | VGA_GRN_HI | 26 |
| GP19 | VGA_GRN_LO | 25 |
| GP16 | VGA_HSYNC | 21 |
| GP21 | VGA_RED | 27 |
| GP17 | VGA_VSYNC | 22 |
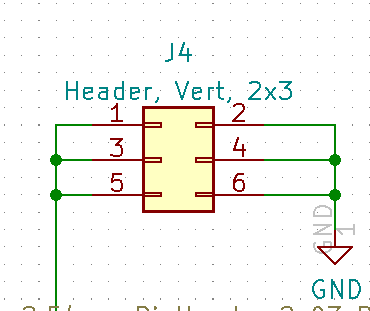
J4 - 5V Input
- Useful for external 5V
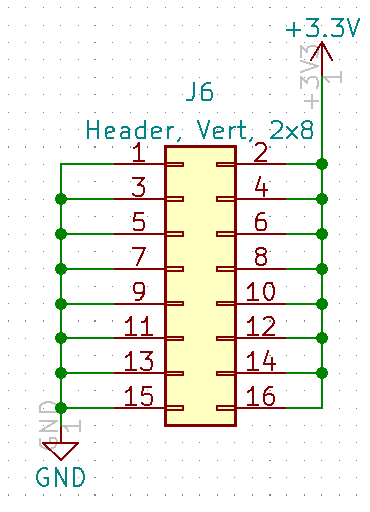
J6 - 3.3V Power Out
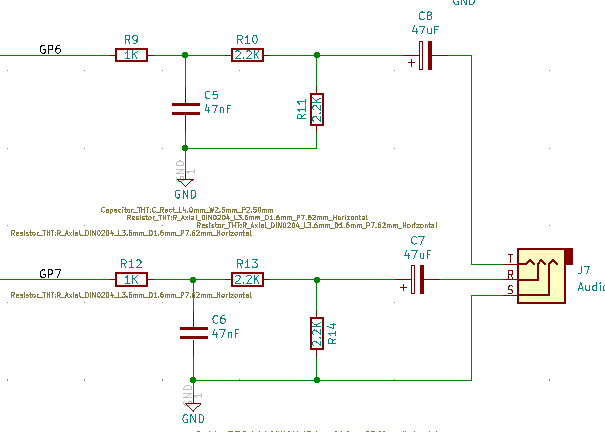
J7 - Audio
- PLAY WAV "file.wav"
J8 - PS/2 Keyboard
J9 - GPIO
- Install jumper to connect Interrupt from MCP23017 to GP0 pin on Pico
- No Pull-up
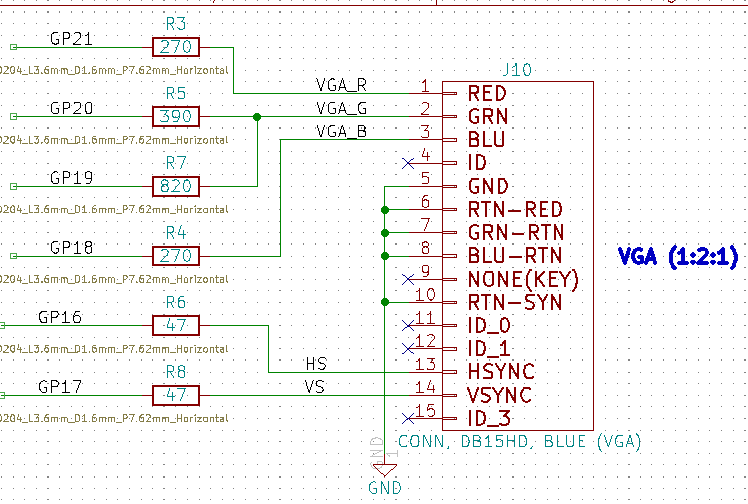
J10 - VGA
The VGA output is 640 x 480 pixels in monochrome mode or 320 x 240 pixels in colour mode with 16 colours (1 bit for red, 2 bits for green and 1 bit for blue). The VGA output is generated using the second CPU on the RP2040 processor plus one PIO channel so it does not affect the BASIC interpreter which runs at full speed on the first CPU. A handfull of components (resistors and a couple of diodes) is all that is required to connect the VGA monitor.
From within your BASIC program you can turn pixels on/off and draw lines, boxes and circles in any colour. Text can be positioned anywhere on the screen and displayed in any colour in a variety of fonts.
The built-in editor within MMBasic works perfectly with the VGA monitor and PS2 keyboard to allow programs to be edited (with colour coded text) and saved to an SD card.
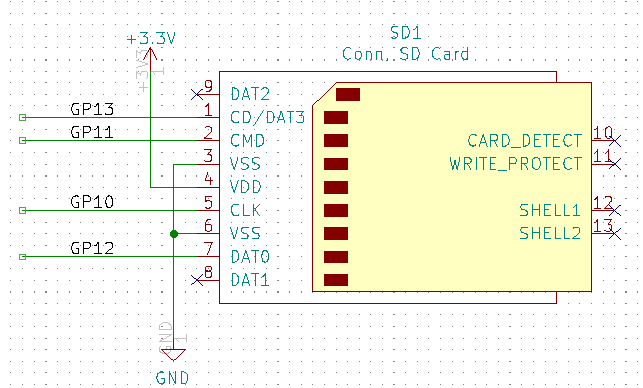
SD1 - SD Card
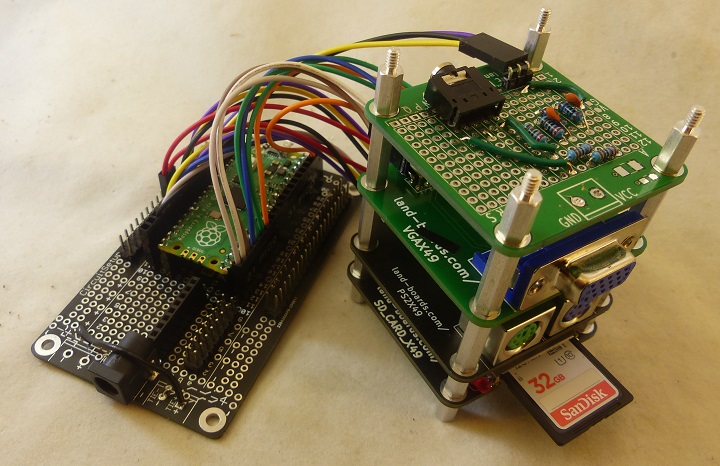
Prototype Build
- Runs PicoMite (MaxiMite) BASIC (VGA, PS/2)
- Uses cards
- Pinouts
Configuration
OPTION KEYBOARD US
OPTION DISPLAY 20, 40
OPTION SDCARD GP13, GP10, GP11, GP12
OPTION AUDIO GP6,GP7, ON PWM CHANNEL 3
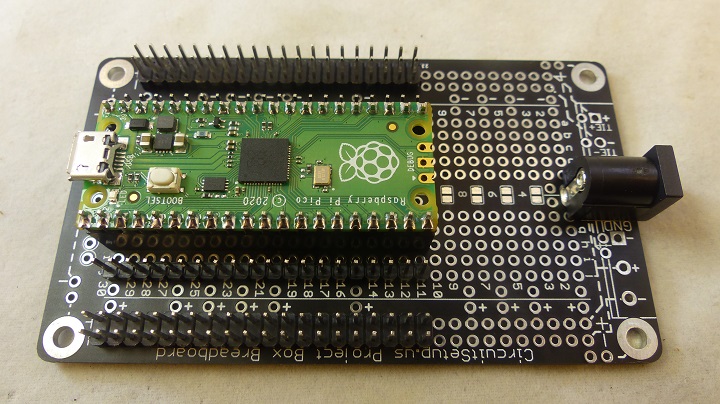
Raspberry Pi Pico in a Small Plastic Project Box
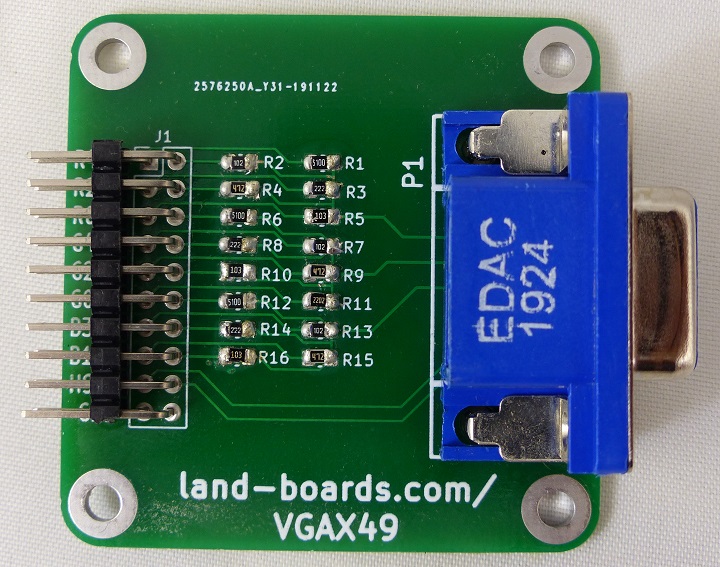
VGAX49
- VGAX49
- Resistors Values
- Selected for 0.7V output on analog RGB pins
- R12 = 270
- R6 = 390
- R7 = 820
- R1 = 270
| R,B | G RES | G | |||
|---|---|---|---|---|---|
| Rs | 75 | R1 | 390 | 75 | |
| Rm | 270 | R2 | 820 | 264.298 | |
| Vin | 3.3 | RM | 264.298 | 3.3 | |
| Vout | 0.717 | 0.729 | |||
| I (mA) | 9.57 | I (mA) | 9.73 |
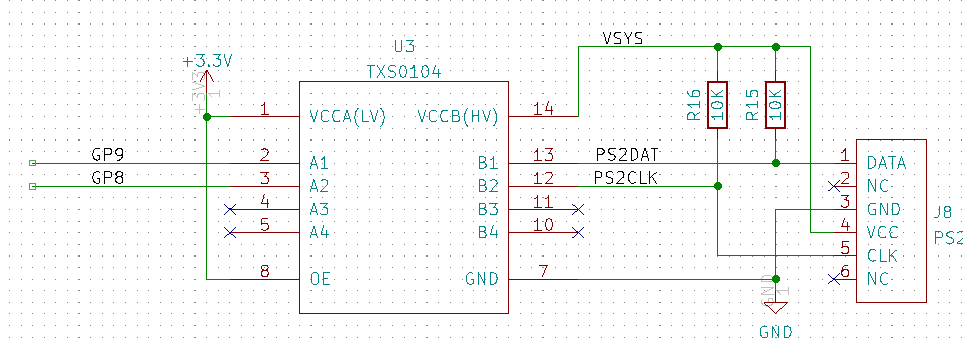
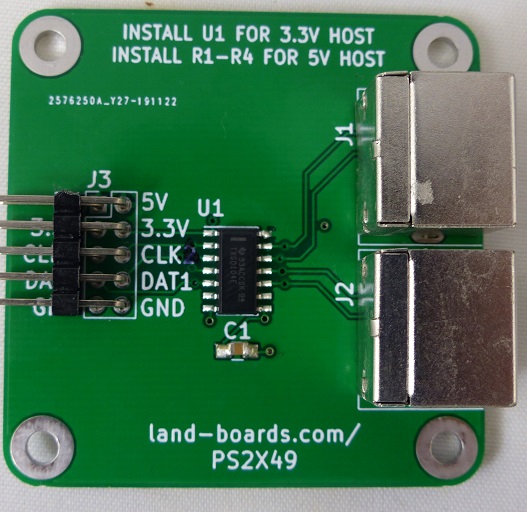
PS2X49
- PS2X49
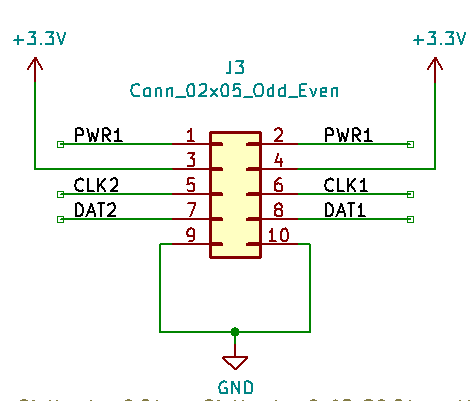
- PWR1 is the power to the PS/2 #1, #2 connectors (5V)
- +3.3V powers the TXS0104 translator
- Routing
- CLK1, DAT1 on J3 go to J1 (Purple)
- CLK2, DAT2 on J3 go to J2 (Not used)
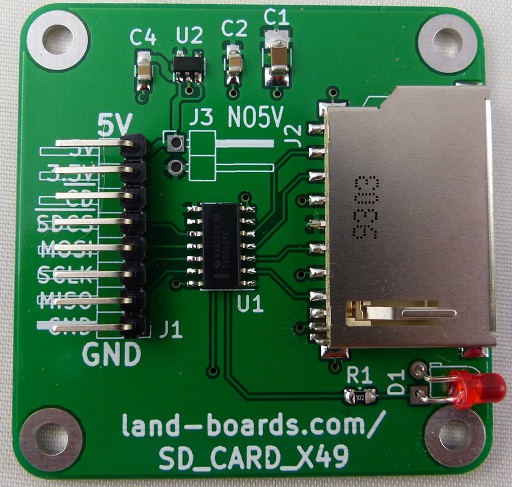
SD CARD X49
- SD CARD X49
- Install NO5V jumper
- Connect 3.3V power
- No 5V attached
- No U2 voltage regulator needed
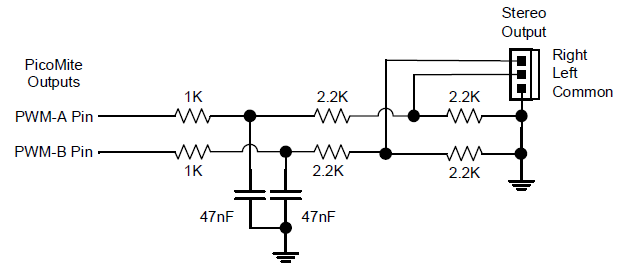
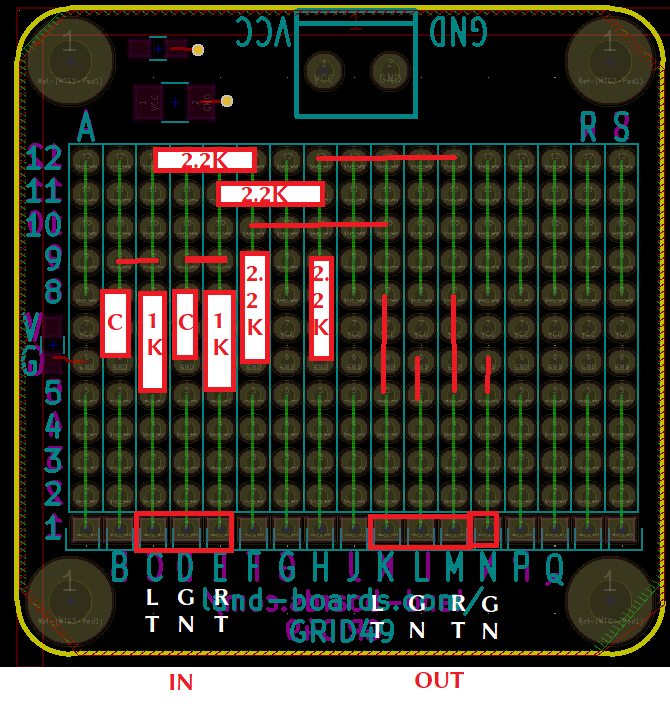
GRID49 - Audio Filter
- GRID49
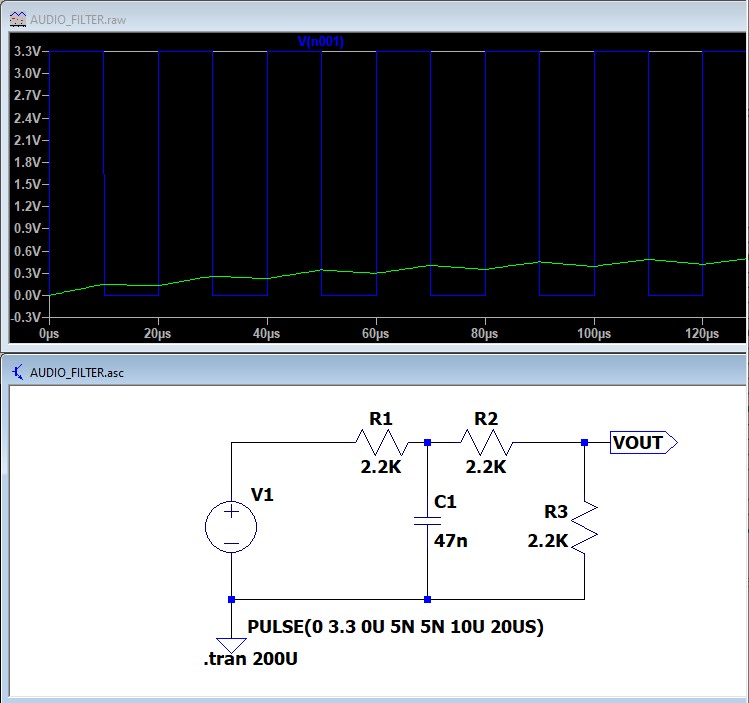
- Audio filter circuit
- C1 = Audio_In-L
- D1 - GND
- E1 - Audio_In-R
Cabling
| FUNCTION | GP | PICO PIN | CARD | SIG | PIN | COLOUR |
|---|---|---|---|---|---|---|
| AUDIO-GND | GND | 8 | GRID49 | AUD-GND | D1 | BLK |
| AUDIO-L | GP6 | 9 | GRID49 | AUD-L | C1 | VIO |
| AUDIO-R | GP7 | 10 | GRID49 | AUD-R | E1 | YEL |
| PS2_CLK | GP8 | 11 | PS2X49 | CLK1 | 6 | VIO |
| PS2_DATA | GP9 | 12 | PS2X49 | DAT1 | 8 | YEL |
| PS2_GND | GND | 13 | PS2X49 | GND | 10 | BLK |
| SD_SCK | GP10 | 14 | SD_CARD_X49 | SCLK | 3 | VIO |
| SD_MOSI | GP11 | 15 | SD_CARD_X49 | MOSI | 4 | BLU |
| SD_MISO | GP12 | 16 | SD_CARD_X49 | MISO | 2 | YEL |
| SD_SLVSEL | GP13 | 17 | SD_CARD_X49 | -SDCS | 5 | GRY |
| SD_GND | GND | 18 | SD_CARD_X49 | GND | 1 | BLK |
| VGA_HSYNC | GP16 | 21 | VGA | HS | 17 | GRY |
| VGA_VSYNC | GP17 | 22 | VGA | VS | 18 | WHT |
| VGA_GND | GND | 23 | VGA | GND | 19 | BRN |
| VGA_BLU | GP18 | 24 | VGA | B4 | 12 | BLU |
| VGA_GRN_LO | GP19 | 25 | VGA | G4 | 7 | GRN |
| VGA_GRN_HI | GP20 | 26 | VGA | G5 | 6 | GRN |
| VGA_RED | GP21 | 27 | VGA | R4 | 1 | ORG |
| PS2_5V | VSYS | 39 | PS2X49 | PWR1 | 2 | ORG |
| PS2_3.3V | 3.3V | BUS | PS2X49 | 3.3V | 4 | RED |
| SD_3.3V | 3.3V | BUS | SD_CARD_X49 | 3.3V | 7 | RED |
Mechanicals
Applications
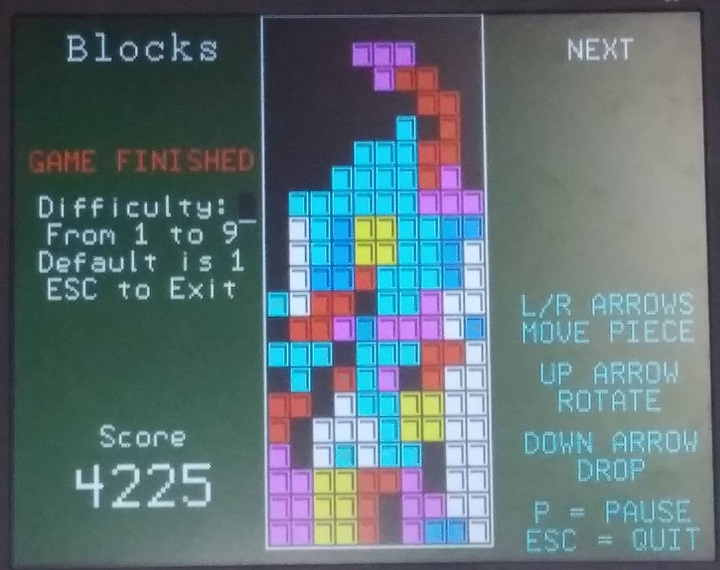
Tetris
> memory
Program:
  13K (10%) Program (485 lines)
  95K (90%) Free

RAM:
   8K ( 5%) 31 Variables
   0K ( 0%) General
 132K (95%) Free
Issues
Rev 1
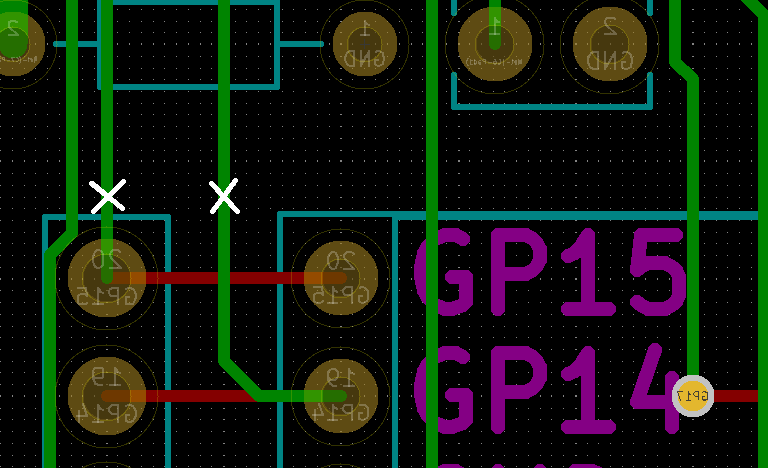
- SDA, SCL swapped to MCP23017
- Cut etch solder side U2-12
- Cut etch solder side U2-13
- Add wire Pico pin 19 to U2-13 (GP14) (or etch that went to Pico pin 20)
- Add wire Pico pin 20 to U2-12 (GP15) (or etch that went to Pico pin 19)
